Monday, December 30, 2013

HAPPY NEW YEAR!


Hello Everyone!
I wanted to take a moment to close out 2013 and wish everyone a very Happy New Year!
My life has been just crazy the past three months with the impromptu bedroom remodel, having the granddaughters for eight days, hosting a luncheon for the Polish Sinfonia of Krakow Poland, dealing with a chest cold, traveling to TN for Christmas with my daughter and her family, the last we will see them for over a year. Let me tell you, knowing I will not have my granddaughters here in the summer or close enough for weekend hug trips hurts a lot. But I know everything happens for a reason and I will move forward - with a plan.

They are moving to WA state. The West coast is one of the most creative areas when you are talking about Mixed Media. There have been a couple of retreats in the OR area I would love to have attended in the past. But my main goal is to go in as a requested speaker/ instructor. So while I will still be making cards, getting albums caught up ( you know, the ones I didn't do last year) I will also be focusing strongly on art journaling and mixed media techniques. I will need to network with that circle more to get my name and work known.

While my GOAL list did not go as planned, I did make 15 hat/ scarf/ mitten sets for the local Mitten Tree. All of the items go to the local grade school a couple of days before Christmas break. I can do a scarf in a couple of days so my goal for 2014 is to make 1 scarf/ hat per week. I've already purchased the treat bags on Christmas clearance. Each scarf and mitten set tucks nicely into the hat then I put them in a treat bag, stamp a bag header and attach.


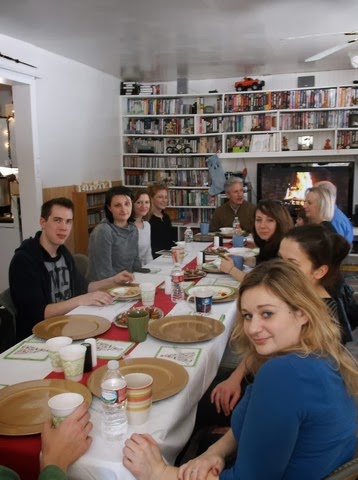
To back track, hosting the Polish Sinfonia was amazing!
I totally spaced taking pictures of the buffet. Everything was made from scratch. That's just how I cook. Bob made Chili and I made corn bread, chicken /w homemade egg noodles, dinner rolls, ham, mashed sweet potatoes, vegie tray and fruit bowl. There was Apple Pie (Steven's favorite) and Pumpkin Pie (Bob's favorite) for dessert. A simple centerpiece down the length of the seating table consisted of 5 silver trays with homemade turtles and chocolate cheesecake bites - both of which Adrian helped make.


I could not have done everything without the help of my loving husband, Bob.

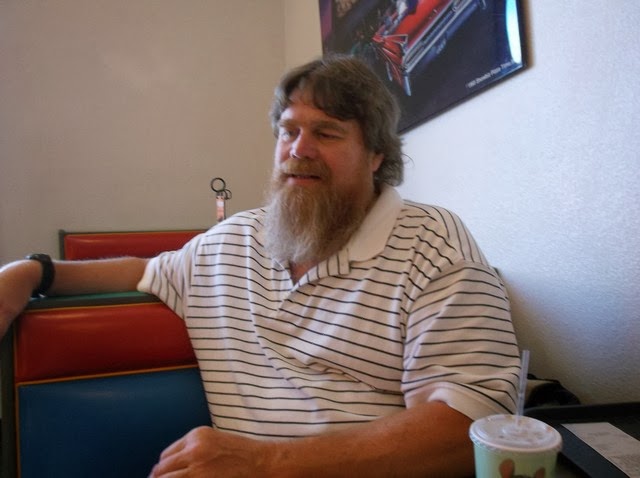
Never mind that he was still in T-shirt, gym shorts and slippers when I welcomed International Maestro Steven Byess and his fiance, Sara Graef (an accomplished composer) into our home. They are down-to-earth people and accept us for who we are ~ country folk.


Bob was hard at work cutting fruit. He also hung back after the event to clean up and put leftovers away while I took Adrian to hear the Sinfonia play. They were scheduled for the annual performance at Birch Tree Elementary but school closing changed their presentation to Birch Tree Place, our local nursing home facility. The residents loved the event and hope the group will return next year.


As soon as the performance was over, I said goodbye to my friends and hurried home to load up the girls and head for Nashville. Talk about a crazy day! But I would repeat it every year to enjoy the blessing of family and friends. 

I will be back later in the week to recap my 2013 and talk about the new/ old goals for 2014. Regular postings will resume on Monday January 6th.  

Creative Blessings for the New Year!
Kelly


Tuesday, November 5, 2013

ON HIATUS - very temporary


Polish Sinfonia of Krakow Poland

Hey all

I just wanted to stop in and let you know I'll be on hiatus, probably for the entire month of November. Bob finished the trim work in the bedroom today. AKA I can move back into the bedroom and out of the living room. From there it's break-neck to get the house in order, decorated for Christmas and ready to host the Polish Sinfonia from Krakow Poland for a traditional American Christmas dinner (buffet style) then show them how we do leftovers the next day when I will serve them lunch.

Polish Sinfonia w/ Maestro Steven Byess
This is also National Novel Writing Month and I'm trying to write my next novella through all of this. Oh and yeah, in a visit to my granddaughter's school last week I picked up a head cold. Grrr. I knew I should have logged up on the Vitamin C before I left. Oh well, I'm popping them like Smarties candy now so this thing shouldn't hang around too long.

I have gotten some really cool things in the mail the past few weeks just not pictures. Let's see, I won an adorable stamp called At Your Service set from The Cat's Pajamas several weeks ago, won the goody bag from Cuddlebug Cuties and got my holiday order in from StampinUp yesterday. So I have tons to play with!

I've also been constructing my new ink spot/ reinker/ mister storage. The components are all cut and I want to take pics as I go so I can walk you through it.

To top everything off, I've been putting Friday Freebie items together so we can start that running again, with a special BIG Friday Freebie for December so stay tuned!


Monday, October 28, 2013

MIXED MEDIA MONDAY - The Faerie Swap


I finally broke down and participated in a swap. Mostly because I needed to get my butt in gear and finish something I had promised a friend months ago and this seemed like the incentive with a bonus. The picture above shows the tag and a gazing ball I made for my friend, Dody. We've been sharing faerie garden posts on Pinterest. 

Because the swap was on Splitcoast, we had to include a paper item of some type so the coordinator, Susan Farrell, decided that we would make a tag to coordinate with our faerie item. For Dody's I used Perfect Plum and a coordinating outdoor acrylic. I had to do 3 additional sets plus 1 for me. I made mine in Pretty In Pink. The other three were done in Elegant Eggplant, Certainly Celery and Daffodil Delight.


Here is a pic of the items I got back in the swap. There is an adorable little faerie house, a table made from a wooden spool complete with a plate of sweets made from very tiny polymer clay canes, a gazing mirror, mushrooms made from polymer clay and a walking stick with a bell. The baggie in the front is the Thank You gift from Susan for participating full of little bits of this and that a faerie may find use for. 

If your not sure what Faeries use, watch the Tinkerbell movies. I love them. Very industries little folk. I can't wait to create my faerie garden and use this precious items as a starting point.

Creative Blessings!


Monday, October 14, 2013

MIXED MEDIA MONDAY - Simple Sleep Shirts

I did have these pics under my Needlwork Thursday but since they are also an upcycle kind of project I thought the would work well here, too.

When the girls were here this summer, I discovered Adrian has grown into the T-shirt and undies sleeping attire. No more buying cute night gowns or jammie sets. In a way, that isn't a bad thing. Even at places like Walmart, those girly items are getting so expensive. A trip to a thrift store will provide you with options for t-shirts to sleep in but they just seem 'blah' to me. Unless you have a favorite like Sponge Bob or Angry Birds. In which case, you don't find a lot of those t-shirts on the discount racks.

So this grandma got creative. I bought a back of boys plain white cotton t-shirts in 2 sizes larger than Adrian typically wears. For about $8 I got 6 shirts. I raided my fabric stash for items I knew Adrian liked. Most of the fabrics were remnants from when I've made her other things in the past such as her Sponge Bob pillow case.

On the night before I had to take her back home, she fell asleep in my bed watching her favorite shows while I whipped these together with the trusty wonder under and the iron.


All 6 only took me about 3 hours but that included pressing the fabric, adhering to the wonder under, detail cutting then ironing onto the shirts.

Creative Blessings!


Monday, October 7, 2013

MIXED MEDIA MONDAY - More toys

Last week I told you about my ability to bring up the rear when it comes to trends and introduced you to my newest obsession of working with Alcohol Inks (well, as soon as I get them made hehe)

The other thing I've been eyeing for some time but not worked with yet is Washi Tape. I kept telling myself I didn't need any because I have TONS of ribbon and fiber. (who doesn't? LOL)  But two things keep pulling me back. 1) there are some really nifty designs out there that fit my Mixed Media style. 2) I can make my own to match what I'm working on.

So aside from picking up a couple rolls at Michaels while in Paducah a couple weeks ago, I also bought supplies to make my own. a roll of masking tape and a roll of paper tape.

So my measly Washi Tape supply looks like this:

Ignore the spool of bobbin ribbon. LOL The package on the right is part of a collection I got in a Secret Sister swap about 4 years ago. Here's a closer look at the two on the right I bought in Paducah:

I have stamp sets that are for doing borders and I'm looking forward to spreading blank strips out on my desk and creating my own designs. 

Now you guys know me and how I like to be organized. So this Washi Tape/ Ribbon tutorial by JenniBellie on YouTube got my attention. Because we heat with wood, keeping tapes/ ribbons/ etc dust free is not always easy. I really like this option so look for my version on an upcoming Mixed Media blog post.

Creative Blessings!


Friday, October 4, 2013

FRIDAY SURPRISE!... Getting Ready for 2014

No one shoot me for that title. With Christmas less than 3 months away (yes, you heard me) I am already looking ahead to how I want to be organized in 2014. And not just in my space but with my time as well. My first novella will come out in early 2014. That means added social media and blogging tasks to what I already do. Until now I've been building a network and letting people get to know me. I'll have to continue that aspect and meeting new people while letting the world know I have a book out and more to follow soon (That's the plan). To accomplish everything I want to do, I HAVE to plan ahead.

I've been pinning lots of 'printable forms' to my Organized Home board on Pinterest. As I began figuring out what I wanted from my new planner, I visited a lot of the websites from those pins. Here's what I came up with:


I used papers from Colorbok Rosewood slab. Fits in with the peach/blue/ vintage I want to use in the office. The quote at the bottom says: Go confidently in the direction of yours dreams. Live the life you have imanged. ~Henry David Thoreau  I've always loved that quote and appropriate for the purpose behind this planner. To go confidently towards a full-time published author.

Knowing what you need in a planner is important. Like other aspects of our life, they are not a One Size Fits All. I'm going to walk you through the pages and why I chose them for this planner.

CALENDAR PAGE
This is an example of a calendar page. I started the planner with December 2013 and ended with January 2015. Out of all the calendar pages I looked at, this one from Infarrantly Creative most fit my style. A basic calendar month with a spot at the bottom for notes. The main thing I use a calendar for is to keep track of Bob's boat schedule. This lets me see at a glance whether or not I can plan to attend a conference or concert. Someone has to be here to take care of the doggies. The other thing I liked about Infarrantly Creative is her planner is put together from a BLOGGING perspective... which is 80%+ of my day.

Behind the monthly calendar The rest of the month is broken up into WEEKS. So the next page is my Master To-Do List for the coming week:
WEEKLY MASTER TO-DO
I can list what I need to accomplish for the week, the Due Date and rank the item in priority.
SOCIAL MEDIA TRACKER
How many times have you entered a challenge or contest on someone else's blog then forgot about it?
The next page (printed on the back side of the Master To-Do, creating the left page) is my Social Media planner is to make note of when I post on someone else's blog. I also make note if I took part in a challenge, shared a post from one of their contests and/ or entered a contest. 

WEEKLY PROJECT PLAN

This is where I make more detailed notes about projects for specific blogs. I can also track Pagiviews on any given blog to see how things are going, twitter/ fb/ pinterest new followers. 
One of the things the gal from Infarrantly does (which this printable is from her site, too) is to make sure to encourage a fellow blogger. There's a space for noting which blogger I'm boosting that week.


This is my BIG page. I list all of my blogs on every day of the week that I want to post on that particular day and what the daily theme is. You'll see the colored in squares.. those are the bullets for that blog. Then the blank one below each one is my 'check off' box for that post.  I'll probably use the Weekly Goals at the top of the page for scribbling notes or tracking my WOYWW Blog #s of those I visit each week.


I thought I had a single shot of the right hand page. This is BOOKS READ. I can track the Title/ Genre/ Author/ Length of 4 books per week plus write a brief review or note where I'll post a review. I'm hoping this page will help me remember to actually post reviews for books I read as I know this is very helpful for an author.


Finally, this last page I created to keep track of what type of Fiction project I work on each day. I can track the number of new words as well as number of pages edited as I am usually working on one while editing another. There's room at the bottom for notes as I'm writing/ editing I want to make sure I take care of.

With the exception of the printables I've already credited, most of the others came from Life Your Way They have over 300 downloadable templates! You can pick the ones you want for free or you can purchase a download of ALL of them for $7! 

Once I had everything printed and the pages in the order I wanted them, I clamped everything together really well with Jumbo Binder Clips then took it into the UPS store and had it spiral bound with a clear coat sheet on the front.

That is my Planner for 2014. 

I'd love to hear about yours. What do you need a planner to do? (the hard copy kind, not the human kind hehe


Tuesday, October 1, 2013

TEAPOT TUESDAY - Patty Bombyk

I haven't played for a couple of weeks but I'm trying to get back in the swing of things. This week's card goes out to fellow SCS member, Patty. Patty's father recently passed away. We all know how difficult those times can be. The teapotters are banning together this week to shower Patty with some of the things she loves such as butterflies and birds.


I chose fall colors for Patty's card as this Anna Griffin butterfly wings her way to Carsonville MI with a special message:

There is no season such delight can bring,
as summer, autumn, winter and the spring.
~ William Browne

I got the basic layout for this card from one on my Pinterest Paper Playground Board. The original was created by Meredith at A Delightful Waste of Time Meredith was inspired by a Flourishes challenge. As you'll see from Meredith's card I did not go all girly with this card. I love hers so much better but didn't feel this occasion called for pink or lace. 

THE RECIPE:
SU - Crumb Cake (base)
SU - Very Vanilla (mats)
Anna Griffin - Butterfly image 
Scrapbook Addict - Sentiment (printed on vellum), printed vellum stickers
Ball - Gold & Green Grosgrain ribbon (sold in a 4-color pack in the canning supplies!)
Misc. Fall wire-edged ribbon

I hope this brings a bit of cuddle to Patty.
Creative Blessings!
Kelly

Monday, September 30, 2013

MIXED MEDIA MONDAY Returns - sort of ...

With the craziness of summer behind me, I'm trying to get back to work on a regular schedule again. I don't have an actual mixed media project this week but did want to share a couple of things.

For as long as I can remember, I've always brought up the tail end of a trend... with enough space between me and the rest of the group to drive a semi through. I'm at that point again. I'm finally getting brave enough to play with alcohol inks. The reason I'm behind is because I have avoided the expense. Like Copics (which I am NOT good with), I was afraid of putting the money out for something I wouldn't like working with... or worse yet, would want ALL of them LOL.

I've known for some time you could make your own. And I've wanted to do this with my SU ReInkers. So with my coupons, I've been picking up the 3-pack mister bottles from RangerInk. They'll be perfect size for a minimal amount of the Alcohol Inks and I can store them with my other SU ink products.


I still need 5 more packages of the mister bottles to have enough to do the current SU standard color families. Then I'll worry about the retired colors in the art room and the In Colors - both current and retired. My goal is to have an alcohol ink to match every SU color I own. 

The Cut n Dry pad is for the next stage of the process. In one of the many videos I watched there was some discussion as to whether the extra 'cush' was necessary or if you could do just as well adhering the velcro and felt sheet directly to the block. My thought was this: If you're 'pouncing' the pad as Tim does, I think the extra padding would help with the overall effect. If you're 'swiping' as some artists do then maybe the extra pad isn't necessary. 

Hubby and I have enough scrap lumber in the shop to make small applicators like the one shown HERE. I bought 2 sheets of felt to cut my own pads based on the size of the applicators I decide to use. I also bought Industrial Strength Velcro to put on each one. 

While watching videos on home made applicators, inks and blending solution there was a division as to whether having just the one applicator then needing to remove the inky felt pads while they're still wet was an issue or not. Alcohol Inks are PERMENANT and although I won't wear the plastic gloves when working on projects most of the time, I would want them on to remove the pads. I know I wouldn't reach for a glove to do that. I don't like wearing gloves of any kind (because they never fit my tiny fingers) So I like the idea of having at least three or four applicators I can work with at once, let them dry then remove the felt. I could buy the RangerInk ones. They are not as expensive as some of the videos lead you to believe. I found them at Michaels for $4.99. That's doable for a couple even without a coupon. For those artists who want one for every color, yeah, maybe not so much. Another point one of the video instructors made was that she tends to grasp the block directly when applying the inks rather than using the post handle. I think I would be doing the same thing so why pay for something I'm not going to use all of when I could easily recycle wood from the shop.

TracysTreasures24 on YouTube was the first video I saw on recycling stamp blocks. Although this gal isn't the one I originally watched, I love her rounded applicators. I think they'd be more conducive to work with when the arthritis flares up. Keep in mind... her video has a warble in the sound but you can at least see how hers differ from the traditional block. 


One of the coolest things I'm going to love about Alcohol Inks is that try as I might I can NOT find YELLOW bling. I can find ones in a slightly yellow/ orange tone but no true Yellow to use for flower centers. With alcohol inks, I can buy bling in the clear whenever they're on sale and make them ANY COLOR I need! Whoo Hooo!

So tell me, do you use Alcohol Inks? Share your experience and usage tips! 
Creative Blessings!


Tuesday, September 24, 2013

WOYWW #225

Okay, first off, is it coincidence that WOYWW #225 is on The 25th? I think not. If you have no clue what I'm talking about, head on over to Julia Dunnit's blog for a long list of blogs we spend hours hopping to. Then for further explanation, go to her EXPLANATION page.

I'm squeaking this in on Tuesday night while I'm tweeting TheVoice for work. I'm trying not to work too  much while my MIL is visiting. Once I get started I forget to stop. LOL

Next on the list is the big REVEAL. Back on #223 I told everyone about the Surprise gifties I was making for members of our Paper Blogger Reunited (PBR) group. Five of our members were meeting up at ScrapFest in Mall of America. I couldn't go but I sent pressies for the other girls via member Maggie. So what did I send?


I took one of those $1 20-pic plastic photo albums then created the cover in PrintShop. I used a glitter mat from DCWV Glitter Pad. They'll have a brag album to remember their trip and pics of each of our members who made the trip.

Finally... my desk for this week. I have no place upstairs to work... aka the music promo/ writing stuff I do every day. The card table I might use is being used for our dining room table while Bob's mom and her husband visit for a couple more days. So everything is on my stamp table. 


You'll see a couple of things handy. I'm putting together a couple of Sympathy cards for her and have some images to stamp. Then it's back to working on my books. The first chapter of my Western Historical Romance, Jayson's Range, took 2nd in competition last weekend so I'm hoping to finish that novel and start putting it out the door soon. 

I should have a scrap project of sorts on the desk next week and back to regular blogging again soon.
Creative Blessings!

Friday, September 13, 2013

CUDDLEBUG CUTIES SEPTEMBER BLOG CANDY! Yum!


Doesn't this collection of goodies look YUMMY! I just want to start playing. Pink and neutrals has become one of my favorite color pallets. And I love MME papers.

I can't take credit for this lovely collection of Blog Candy. That goes to Anna Stillwell at Cuddlebug Cuties. This is her SEPTEMBER BLOG CANDY GIVEAWAY!

You don't have to do anything special for a chance to win... just leave her a comment on the post. 

While you're there, sign-up for her emails. She shares some of the cutest images. 

Wednesday, September 11, 2013

WOYWW #223 - Something for Special Friends

Happy WOYWW everyone! Have no clue what that means? Hop on over to Julia Dunnit's blog. She is the ringleader of our group of window peekers. We travel the blogesphere every week looking in on others' studios to see what everyone else is working on. Go HERE for official details and how you can become one of us!

After a couple of down weeks (has it really only been that long?) I was able to do some creating this week. I got some cards made. Have a few more to go but it felt good to play!

So what am I up to this week? Well, it's kind of surprise.


Several members of our Paper Bloggers Reunite group have booked their flight and hotel reservations and are now stressing over what to pack. They are converging on Mall of America for ScrapFest2013. I wish I were going, but I'll be there in tangible spirit. I'm not giving any more details but Maggie will have something for each of them from me. 

And that, my studio peeping tom/ tomettes is all you get this week. 

Wednesday, August 28, 2013

WOYWW #221 - My other 'desk'

Guess what day it is? Now, the camel is not wondering around my office. Rather, the WOYWW participants are wandering from blog to blog to see what everyone else is up to. Need a better explanation?  Hostess, Julia Dunnit at Stampin' Ground has created this awesome web of participants that allows us to peek inside each other's studios every week. Just click -> WOYWW to see what it's all about.

With a flea problem in our bedroom, I've been a bit preoccupied trying to assassinate them (without success) so I haven't had the time to work on the organization of the studio. Instead, I thought I'd show you my 'other studio' - the Mixed Media area in my sewing room.

I have a big 2-door pantry that looked like this: 

This cabinet use to house every crochet/ cross-stitch/ plastic canvas/ general craft magazine I owned. I decided I needed more room to 'organize' my mixed media materials (that's my story and I'm stickin' to it).
So I transferred the contents over to a 5-shelf bookcase like the one you see just to the right of the cabinet. BUT not everything went on the shelf. Those binders actually house complete issues of magazines. So Cross Stitch magazines were all in binders, etc. I spent an entire weekend bookmarking items in the magazines I wanted to keep with a post-it tag, copied said articles then donated the magazines to the library store. I still have the Counted Cross Stitch to go through but everything else is GONE!

Then I began the process of organizing my Mixed Media supplies. I'm not going into detail on what the individual shelves contain as I'll be covering that in the Organization Class come up in January.
But here are a couple pics of what this cabinet looks like now:


This first pic is of the top shelf. I built the paint cubby and the staircase storage from foam core board. The staircase storage holds 9 mister bottles - for the 9 colors I'll work with most often. You'll find out more about the drawers in January. The bottles are removable - 3 to a tray - so I can access the drawer on the next tier if I need to. The only other thing that sits on this shelf in that big open area for now is a square basket holding my My Minds Eye 6x6 pads and my heat gun.


The full view of the cabinet. It is not as cluttered as it looks. Nothing is 'stashed' behind something else. I can access everything easily without a waterfall of supplies. 

I still need to make the storage racks for the Stampin Up wheels. I'm making those out of foam core and they'll hang by Command strips on the inside of the door. I'll be able to open the door, see the image on the wheel and pick the one I want. The key for me was to have everything in full view. I open the doors and I can see everything. 

So there's my 'other desk' and a sneak peak at what is to come in January. 
Now, on to the next blog.
Creative Blessings!


Friday, August 23, 2013

ORGANIZATION CLASS - Postponed

Photo from Morguefile

With trying to catch up after losing my modem, signing my first book contract, multiple articles due and precious time with my personal hero (hubby), I've not had the time to finish putting this course together. Well, most of the materials are together but I had plans to bring in some guest bloggers - relatively big names in some of the artistic fields - and the time to contact them, expect a response and their post is just cutting things too close for them.

I had thought about October but that gets us into fall, getting ready for holidays and all that stuff. So I've decided to hold off until January. January is the perfect time because many of us are looking at 'fresh starts'. As of right now, the dates are Monday January 13th - Monday February 17th. I'll post the Weekly Lesson on Monday and we can talk about things throughout the week.

I hope to get the button made later this week. As soon as the button is up, feel free to post to your blog sidebar and tell your friends. This first time around is FREE. I'll be using the evaluation afterwards to make any changes based on your comments. Guinea Pigs get all the perks and privileges :-)

Thank you for your patience. I promise you the class will be better for the wait.

Creative Blessings!
Kelly

Wednesday, August 21, 2013

WOYWW WEDNESDAY - #220

PRODUCT UPDATE!
Here is the link to the Menards website showing the tray I used. Even if you don't have a Menards in your area, you can always print out the picture and take it to your local home improvement store. I have yet to have anyone know what I'm talking about when I ask for a Gable Vent. LOL 

http://www.menards.com/main/building-materials/roofing-soffits-gutters/ventilation/static-foundation-vents/12-x-12-aluminum-gable-vent/p-1697307-c-13260.htm

I really love What's On Your Workdesk Wednesday. Hostess, Julia Dunnit atStampin' Ground has created this awesome web of participants that allows us to peek inside each other's studios every week. Just click -> WOYWW to see what it's all about.

Although my desk is not a disaster for a change, I haven't had time the past couple of days to really work on anything. Bob took the opportunity to work an extra week on the boat so we could afford to spend three days in one of my favorite communities - Paducah KY. They will be hosting BBQ on the River the weekend just after my birthday. I'll have 2.5 days to wander the art district, enjoy scrumptious bbq and do some research for my next novella.  All while my husband follows patiently, letting me do my thing. This Sunday will mark 29 years of marriage and we are as happy now as we were then. We're still best friends. So he left yesterday and will be gone an entire month. He'll come home just in time for his mom and her husband to arrive for a week-long visit.

Last week we spent three days in Sprinfield MO celebrating our anniversary early. He got the pool and hot tub he wanted and I got to poke through stores. We spent over an hour touring the gun museum at Bass Pro. Wow! Some amazing pieces of history in that place. Whether you like guns or not, if you love history you really need to put this on your Places to See list. We ate way too much food over the course of three days. Wednesday night we ate at Outback Steakhouse. Enough said. Thursday we ate at Hemmingways @ Bass Pro for lunch then Red Robin for supper. We'd never eaten there and enjoyed the food. I think I enjoyed playing Galaga and Ms PacMan more than the food :-) Friday before heading home we ate at Asian Garden. They do all-you-can-eat crab legs on their Friday and Saturday dinner bar.

For stamps I found this nice collection at Michaels...


I found this set at Hobby Lobby. Perfect for a writer, don't you think? 

And a better look at what those Halloween stamps are resting in...


This is an attic vent. I can pull the loose stamps from the drawer I want to use and sit them in here. No more having the stamps scattered across the desk in my way! This is a 12x12.

That's all my desk you get to see this week ;-). I'll be visiting 'round the neighborhood later this evening or tomorrow. 

Creative Blessings!
Kelly


Tuesday, August 13, 2013

MMTPT263- Flowers for Janet

Felt great to play this morning, and I'm so happy to be making a card for a fellow artist. Janet Little has been diagnosed with Stage 4 cancer. Though not the worst kind (Cancer is the worst in any form IMO), Janet has a positive attitude. She says "it's not up to the doctors but up to God as to when she leaves this earth."  You can read a bit about Janet HERE


Because she loves flowers and bright colors, I knew I wanted to use SU Garden Collage (Retired) The bright pop of color is SU Melon Mambo. Although Janet works mostly with oils, I didn't think she'd mind a little water coloring so I used SU Watercolor Crayons in Razzleberry, Regal Rose, Daffodil Delight and Garden Green to wash in the flower and butterfly. 

To accent I used what has become my go-to punch, the MS Lace Border. I inked the edge of the button then added a bit of bright pink paper twist as the 'thread'. 

When I first pulled this set out, I started working with Marina Mist. By the time I finished I realized I had a Sympathy card. As I was cutting for two cards, I now have a couple of those in my stash. 

Creative Blessings!
Kelly

Thursday, July 18, 2013

GELLI PRINTING GIVE-AWAY - Through July 22nd

For my FRIDAY FREEBIE, I'm directing you to a cool blog... Gelli Arts


Now through July 22nd they are giving you the opportunity to win:


Just go HERE to see their great tutorial on gelli printing with words and comment and share the link to be entered in the give-away.

Good Luck!
Creative Blessings!
Kelly

Wednesday, July 17, 2013

WOYWW #215 - Leftovers and new toys

Happy WOYWW everyone!
I really love What's On Your Workdesk Wednesday. Hostess, Julia Dunnit atStampin' Ground has created this awesome web of participants that allows us to peek inside each other's studios every week. Just click -> WOYWW to see what it's all about.


My rule of tidying up after a project just was not an option last week. I finished Cheyanne's baby album at midnight on Thursday night. We were to be on the road by 8 a.m. the next morning and I still had dishes and packing to do. The fact that Bob had done the dishes by the time I got upstairs came as no surprise. He's good like that. 

Okay... so what did I leave behind:
You'll see the spots with the daubers on top. SU Pretty in Pink and Regal Rose were the color choices I worked with, along with the gemstones, ribbon options, tape runner refills, paper roses from Recollections and scraps from that wonderful paper. Oh yeah, and a few butterflies waiting for the next project.

What did I bring home:
Two of my SIL's are paper crafters. So that meant a trip to Hobby Lobby. Okay.. two trips. I made one with my MIL as she needed to pick up a beautiful cross-stitched picture she made and had framed for Libby Ann's room. On that trip I picked up a Cricut cartirdge on clearance... a Christmas one and the tag stamps also on the clearance rack. The snowflake brads were on sale.  

On the second trip with SIL Rhonda I found the tool set I've been wanting for making flowers. I've seen the YouTube making these but kept forgetting to look for the tools whenever I went shopping. They had one set left and I had a 40% off so the purchase was preordained :-) Rhonda also told me about the Cricut Craft Room. I am in so much trouble. LOL Need to get the office cleaned so I can play with that program. If you've used it, I'd love to hear from you!

Today is all about getting the dog kennel cleaned before the weather gets too hot to breathe then moving into the air conditioning to promote multiple Texas and Nashville recording artists, letting their fans know where they can hear them play over the next seven days. Tomorrow and Friday and I dig into the office. So anxious to get everything back into place.

Happy Crafting and Creative Blessings!
Kel

Tuesday, July 16, 2013

WELCOMING BABY! - Shabby Chic 1st Year Album


I finally got to make time last week to play. And I had so much fun creating this shabby chic album for my niece, Cheyanne. I've never worked in shabby chic before so this was fun to play with. I should have done an 8x8 but I am happy with how the 6x6 turned out.

This album was originally brown. I removed the plastic cover, took the posts out allowing me to dismantle the album. I used hot glue to adhere the unbleached canvas to the front and back covers and wonder-under for the spine piece. I did the inside covers with April Lovely cardstock by Core'dinations. If you've not used this cardstock before, it has a beautiful canvas texture. I chose April Lovely, Mystic Gray (which actually has a sage green tone to it) and Picket Fence. I found them at JoAnns Fabric and Crafts.

I raided my vintage lace and trim sewing tub for soft textures. The cover has 2 different layers of lace plus a strip of white/ pink daisy ribbon from The Paper Studio. All of the flowers are from Recollections except for the antiqued one in the center. That is made from 6 scallop layers punched from book pages and inked with SU Caramel. The baby buggy is made from 1 and 1/4  scallop circles punched from SU Pretty in Pink and GP White. You will find the directions HERE. I added the mini flower punch 'spokes'.

One of the embellishments I used throughout the album was the mini butterfly punch from SU. I punched some from GP white, and some from DCWV Shimmer Matstack. Some of the white ones I brushed with ink or stickles, others I left plain. For the body I used Recollections teardrops or The Paper Studio gemstones. The pink ribbon is pink grosgrain from Paper Studio bobbin.


The inside cover is stamped with an Innie Outie stamp in SU Regal Rose. I've layered the stamped GP white mat on a sheet from DCWV Garden Party. I loved the hints of the pink tones I had in the Recollections flowers. Then these were layered onto the Mystic Gray.


Here is a sample of a 2 page layout. There is a spread for each of the first 12 months of little Libby Ann's life. I used the Picket Fence for all of the 6x6 bases. The titles are printed on GP white using the MEANINGFUL font. You can download it free HERE. Each title mat was layered onto the April Lovely then Mystic Gray.

The journaling box is corner punched with an EK Success decorative corners - Lace. The pink ribbon decorative strip is layered with a soft green print from the DCWV Garden Party slab.  On the facing page, I brought in some of the vintage lace (no, that isn't paper). The photo mat is large enough to accommodate a 3x5 photo... just the right size for a 1st year picture. The concept is to see the subtle changes the child goes through from month to month that we often don't see as they occur. The only embellishments I used were the flowers from Recollections (there were 3 each of 3 color tones in the package) and the butterflies.


I know Cheyanne liked the album and I loved having the opportunity to give her a head start on documenting little Libby Ann's life. Of course, her grandma (my SIL, Kelly Sue) has a new camera and has been taking tons of pics of the mommy-to-be and is a paper crafter so I know there are more albums in their future.

Tomorrow is WOYWW. Are you sure you want to see the mess I left in the wake of this album as we headed out the door to OK last weekend? Come back and see me. I'll show you what I bought while we were there.

Creative Blessings!
Kelly