Wednesday, April 27, 2016

WOYWW #360


I'm down to two weeks left to finish this studio and while I know I've made a dent (though a small one), I really am going to have to push if I'm to finish getting the studio in order by the time Bob comes home.

As you can see, everything I had sorted last week has been put away. Yay! 
My Journaling by 5s journal is on the left, waiting for this week's challenge. The red binder will become my Stampin Up catalog - my visual of everything that is current that I have... stamp sets, cardstock/ designer paper, inks. So as I'm ordering and planning projects for my SU blog, I know what I have to work with. There are some page protectors in the front to use and one of several boxes of SU stamp sets that I need to catalog. That is my project for today, as my kit arrives this afternoon.

That's my desk? What's on yours? When you are done visiting me in the Ozarks, please hop on over to Stamping Ground where Miss Julia has a long list of other studios you can peek into. No standing on an up-turned milk pail to look in the window. We open the doors wide and welcome you. We won’t touch.. just look. J  I can't wait to peek but if Bob is home for I might be late again getting 'round. Pleaseleave your number and you'll be first on my list.

Friday, April 22, 2016

FRIDAY FREEBIE- Journaling By 5s- Step 3

This week was a learning curve for me. I have discovered my Folk Art paints are my favorite medium for stenciling. The sprays I had were too thin. I will admit to spending more than the 15 min. But when I realized some mediums were not working, I stopped the timer and went in search of new. I probably have 20 minutes total. 

I used a variety of stencils and stamps for this. All the stamped images were done in Memento Tuxedo Black. For stencils, I used some negatives I had of punched images as well as Tim Holtz and Martha Stewart in the mix. 

Here's a reminder of how this started.


I'm really excited about Step # 3 this week. We were to spend 15 minutes adding PATTERN to our pages with Stamps and Stencils.

This challenge gave me the opportunity to ink up some of my art stamps for the first time as well as play with my watered-down acrylics and my Distress Spray Stains. I also found out I have a larger collection of stencils than I thought I had. 


I hope you are enjoying the process as much as I am. Are you playing along? If so, link up in your comment so the rest of us can come have a peek and leave some love.

Creative Blessings!
Kelly 

Wednesday, April 20, 2016

WOYWW #359


Good morning, friends!
An overcast day in the Ozarks. A bit of rain here and there. I've been thinking of my Texas friends all week. I hope you all are safe.

My desk is a mass of sorted stuff. I have all this junk stuff sorted, ready for pocket pages. Then I took time to sort the pocket pages and put them in a binder so I could just flip through and get the pages I needed.... and that's as far as I got before business stuff kicked in. I should be done with the 'have to' biz today and can get back to the organizing/ putting away. I HAVE to have the office completed in three weeks. No pressure. :-D

To top it all off, I'm signing the paperwork today to become a hobby dem with Stampin' Up. Mostly, because I'm tired of my reps falling off the face of the earth and not getting catty's in a timely manner. I am planning on setting up a blog strictly for SU and will post there on Mondays only.

That's my desk? What's on yours? When you are done visiting me in the Ozarks, please hop on over to Stamping Ground where Miss Julia has a long list of other studios you can peek into. No standing on an up-turned milk pail to look in the window. We open the doors wide and welcome you. We won’t touch.. just look. J  I can't wait to peek but if Bob is home for I might be late again getting 'round. Pleaseleave your number and you'll be first on my list.

Friday, April 15, 2016

FRIDAY FREEBIE - Journaling By 5s - Step 2


Before I show you what I came up with, here's a reminder of the Journaling By 5s process. Each step is to be done in 15 minutes... all 20 pages should have something on them by the time the buzzer sounds. That is less than 1 minute per layout!


Step #2: Adding Texture through Collage/ Recycled stuff.

I decided I wanted to use just paper scraps but I have not located my scraps drawer yet. So I randomly selected sheets from 6x6 paper pads that fell into the same color family as the paints I'd worked with. I also grabbed a piece of sheet music. While rummaging, an insurance premium stub fell from a journal. I figured that needed included.

Here are the papers I worked with:


Here is the slide show. I apologize for the pages being horizontal. For some reason, no matter which way I turned them in the file, they uploaded this way into Kizoa. I will try a different photo angle next week.

This slide show has music. Mouse over the video to see the speaker icon at the bottom of the video and make sure it is not muted. 


I look forward to hearing your thoughts on this journey. I'd love to have you join us!
Creative Blessings!
Kelly

Thursday, April 14, 2016

PRIZE PACK WIN!

Back in March I entered a Blog Candy drawing over at Christi Conley's blog - Art-Without-Anxiety . We had no clue what Christi would include in her envelope. But to our surprise she drew TWO names because, like the rest of us, she had lots of goodies to share.  My package arrived on Tuesday.  Lots of goodies and most from companies I'd not heard of before.


On the left, there is a stampable photo frame on the bottom of the stack. The rest is a variety of designer papers and a package of PL style cards. 

The center stack is a large sheet of cardstock die cuts. I love the black on craft paper. They'll go with anything! plus those stitched felt flowers and dream.

The stack on the right is some organza flowers, library pocket cards, bling and a set of clear stamps. 
A yard of teal ribbon and a smaller unmounted rubber stamp didn't make it into the picture.

Christi was incredibly generous and I look forward to putting my winnings to use. 

Aside from generous, she is also very talented. I hope you'll pop over to her BLOG and see for yourself.

Creative Blessings!
Kelly

Wednesday, April 13, 2016

WOYWW #358

My desk this week isn't very exciting. Bob wound up leaving today instead of this past Monday so we had a couple extra days together to work in the yard.


The stencils are still in need of putting into the new Template and Stencil binder from Totally Tiffany. The flags you see on the right are her 'shut your flap' tabs used for securing the little flaps on the scrap rack page flaps - for those of us who tend to stuff them really full ;-)

The twine and the ink spot are from part of my Simon Says shopping trip with my GC from the February Tim Holtz tag. I went over my $25 but just had to splurge on a few things. (see pic below). I left the two items above out so I'd remember to email Mario and let him know there are no links on their inventory list to the Simon Says sight for those.


The picture above is my Tim Holtz splurge. I picked up some of the mini misters to go with inks I have plus added 4 new ink spots and the Paper Mosaic Kit he uses in his April tag. I need to see how weather proof that kit is. I'm thinking stepping stones for my fairie garden using paper scraps if they'll hold up to weather. Mario will know hehe


Last on my shopping spree was the flower border die used in the Easter card I told you about HERE.
And I've been on the hunt for a good 'egg' die that would cut multiple sizes. 

That's my desk? What's on yours? When you are done visiting me in the Ozarks, please hop on over to Stamping Ground where Miss Julia has a long list of other studios you can peek into. No standing on an up-turned milk pail to look in the window. We open the doors wide and welcome you. We won’t touch.. just look. J  I can't wait to peek but if Bob is home for I might be late again getting 'round. Pleaseleave your number and you'll be first on my list.

Friday, April 8, 2016

FRIDAY FREEBIE - Journaling By 5s - Step 1


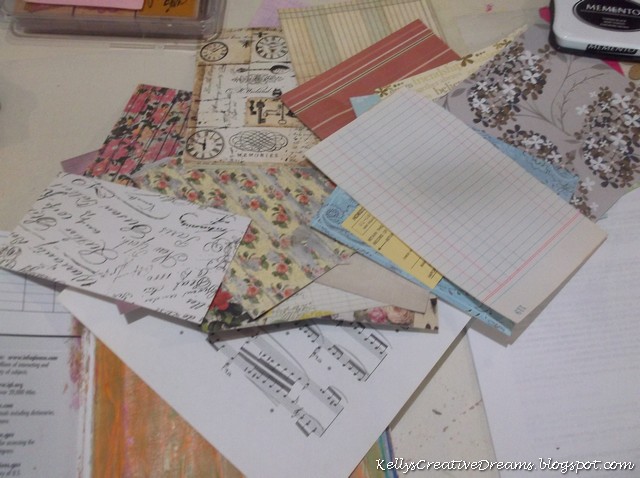
I can tell you, the KIZOA flip-through is not very interesting and why I did not feel pressured to get it done. 20 pages of slaps of color not overly exciting LOL. While you will not see the backgrounds this week, I am going to show you the colors I worked with below.

Beginning Tuesday April 12th, I will have 28 days of uninterrupted time to put things in order, update blog posts and play in the studio. I may even have new toys by then.  Thanks for understanding!


This week I tackled Step #1. I'm pretty sure this is the most fun part. Paints and Inks. Can't go wrong getting inky!

The basic concept is you ONLY SPEND 15 MINUTES for each Step. Gather the supplies, set a timer and GO! I can tell you that 15 minutes goes quick. 

Before you see my pictures of the process, here's a quick recap of the Journaling By 5s process:


From this week on, I'll be using a Kizoa video to flip through my pages. I might take on YouTube in the future, but right now that is not in my learning curve time frame. 

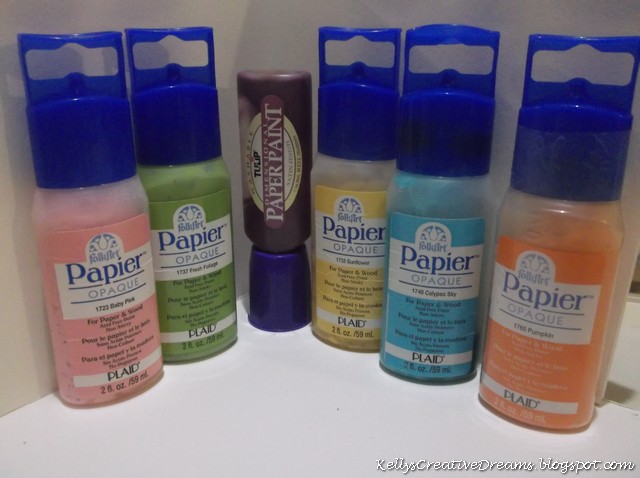
I started with these colors. These are old Papier Paints. Very gloppy.  HERE and HERE are two previous posts I did using these paints. I just can't bare to throw them away. Some, as you can see on the far right, have never had the seal cracked on them.


But once you mush them up with a spritz or two of water and a pallet knife, you have a product you can work with:


They applied nicely with the brayer, I may look at the thrift store for a personal sized blender that I can mix them up in then restore in their bottles so I'm not having to do the mushing process each time.

After applying the paints to my pages, I used multi-purpose art pad from the dollar store to swipe the paint remnants from the craft mat. I got several 'prints' but here's a sample of what was on the mat


Wednesday, April 6, 2016

WOYWW #357

First off, this morning I want to apologize for not getting around to more of you last week. Once Bob comes home, seem all we do is go go go. I probably won't get much opportunity to leave love on your blogs until he leaves on Monday night. So much needs done before he leaves for the next 28 days. Please leave love and you'll be first on my list of visits.

My desk this week is a mess. I'm in the process of putting all of my stencils into this binder. I just was not happy with them in the ScrapRack. I wanted all the stencils together.  To the left you'll see my January section of the Scrap Rack. I added a second complete base over the weekend just for my calendar year section.


That's my desk? What's on yours? When you are done visiting me in the Ozarks, please hop on over to Stamping Ground where Miss Julia has a long list of other studios you can peek into. No standing on an up-turned milk pail to look in the window. We open the doors wide and welcome you. We won’t touch.. just look. J  I can't wait to peek but if Bob is home for I might be late again getting 'round. Pleaseleave your number and you'll be first on my list.

Tuesday, April 5, 2016

TEAPOT TUESDAY & TECHNIQUE - Symmetrical Sun


During VSN at Splitcoast Stampers, Challenge #2 was to focus on the Symmetrical part of the sun.. the repeating pattern of the rays coming from around the circle of the sun.

Another Christmas card idea came from me.. and was inspired by THIS card on Pinterest. The card was designed by Anne Marie Hile at Stampin' Anne

The repeating pattern behind the circle is the scallops! Above, you can see the items I used. The variegated blue ribbon was from my stash. I had enough to make 7 duplicate cards. The snowflake is a Martha Steward punch. I used Recollections cardstock. The patterned paper is Vintage Blue Snowflakes from Paper Studio.

That cute little snowman is from a set called Christmas Fun (SU- 1992). I cut him out with the #2 circle on the Spellbinders Circle set then coated him in Dimensional Glaze. The sentiment you'll see later is from the Christmas Greetings set (SU 2010)


Here you can see that I didn't quite cut out the snowflakes completely. I lopped of their heads. I started by centering one on the blue strip, then placed 2 on either side to for the snowflake border. Then the copped off section was covered with the ribbon.

Here's the finished card:


I was really happy with how this one turned out. I might have to adhere the snowman circles in place better before mailing. They want to curl up. But an easy fix.

Creative Blessings!
Kelly


Friday, April 1, 2016

FRIDAY FREEBIE - Journaling By 5s - Intro

NOTE:  This post is going to be longer than the remaining posts in this series. This post provides you with background and links as well as Session 1.


For the Friday's in April, I will be walking you through my experience of Journaling By 5s. The concept was created by Texas artist/ blogger/ youTube queen - Shannon Green

The idea is to just open yourself up and allow the creativity flow... in an Left Brain/ OCD kind of way. Boy, does she have my number! Shannon has blended the analytical, step by step Left Brain with the free flowing Right Brain in a fun and short-based journaling project. With Journaling By 5s, you can have a COMPLETED art journal in 2 hours!

We are not talking about something with a theme, or the Kelly Rae Roberts artistic style. This is more about slapping down a wet medium on a page. Then glue and doodle. That's it!

Today's blog post is all about getting started. Here's what you will need for this project:

Composition Journal
Glue Stick
Paint/ Ink
Collage/ Recycle/ Images/ Words Mediums
Stamps/ Stencils
Pens/ Pencils/ Markers

Here is an overview of how Journaling By 5s works:


You do NOT have to use a Composition book. You can use 20 pages from anything. Kelly Donovan chose to use 20 individual pages, which allowed her a bit of freedom when applying  her wet medium in Session #1.  Just keep in mind that if you are planning to use a wet medium like paints, then you want something that can hold up to those. 

If you use a Composition book, you will want to glue 5 pages together, to form a single page. Do this to create 20 'workable' pages. Here you can see I counted the page groupings together and paper-clipped them. Then all I had to do was remove the paper clip and glue the pages in that 'signature' together:


I used the backing sheets from contact paper (left over from all the contact paper I used when putting the studio items together) to keep my groups separate during the gluing process. 


My husband was kind enough to take these photos for me.

After applying glue with the glue, I smooshed pages together to get a good stick.


I now have 20 thick pages to accept my wet mediums I'll be applying next week. Come back Friday to see what colors I work with. That's when the FUN really begins!

Creative Blessings!
Kelly