Showing posts with label TheScrapRack. Show all posts

Monday, July 25, 2016

MAGNIFICENT MONDAY!

This is a step away from my Mixed Media Monday because I have something MAGNIFICENT to show you:

After months of sorting, embellishments...


And paper, by theme, calendar year and color....


Getting everything into the perfect page. Making sure not to over-fill the spinder...


Setting up the 3 bases, and adding extra industrial strength velcro over the seams..


And TEN YEARS of knowing I wanted a ScrapRack....

I am finally at THIS point....


This is 3 bases.

Here are a couple shots of the back:


A close up shot showing the spacing/ staggering of the spinders....


After trial and error, we found spacing to be critical. I counted up the number of spinders I had then started in the middle... working my way out to either end so that they'd be balance. I have to tell you - STILL didn't work. I still have room on the right for at least one, maybe 2 more spinders. Hmmm. I'm thinking Project Life. That will free up 2 book shelves :-D

This is the 2nd biggest project in the studio. The first was cataloging all of my stamps. I'll show that post next Monday.

I have things to do this week. I'll be here for WOYWW on Wednesday then not again until Monday.

Creative Blessings!
Kelly


Tuesday, November 10, 2015

GET ORGANIZED CHALLENGE - Embellishments


Week 2 in the ScrapRack Get Organized Challenge we worked on Embellishments. I do not store most of my embellishments in the scraprack. My fingers and those little 2.5 x 1.5 jewelry bags do not get along. I keep mine in the drawer of my stamping center. What I do plan to do is put a representation of each embellishment on my Color Family 12x12 in the Rainbow section so when I'm looking at colors I will know at a glance if I have the color I'm looking for before I go to the drawer.

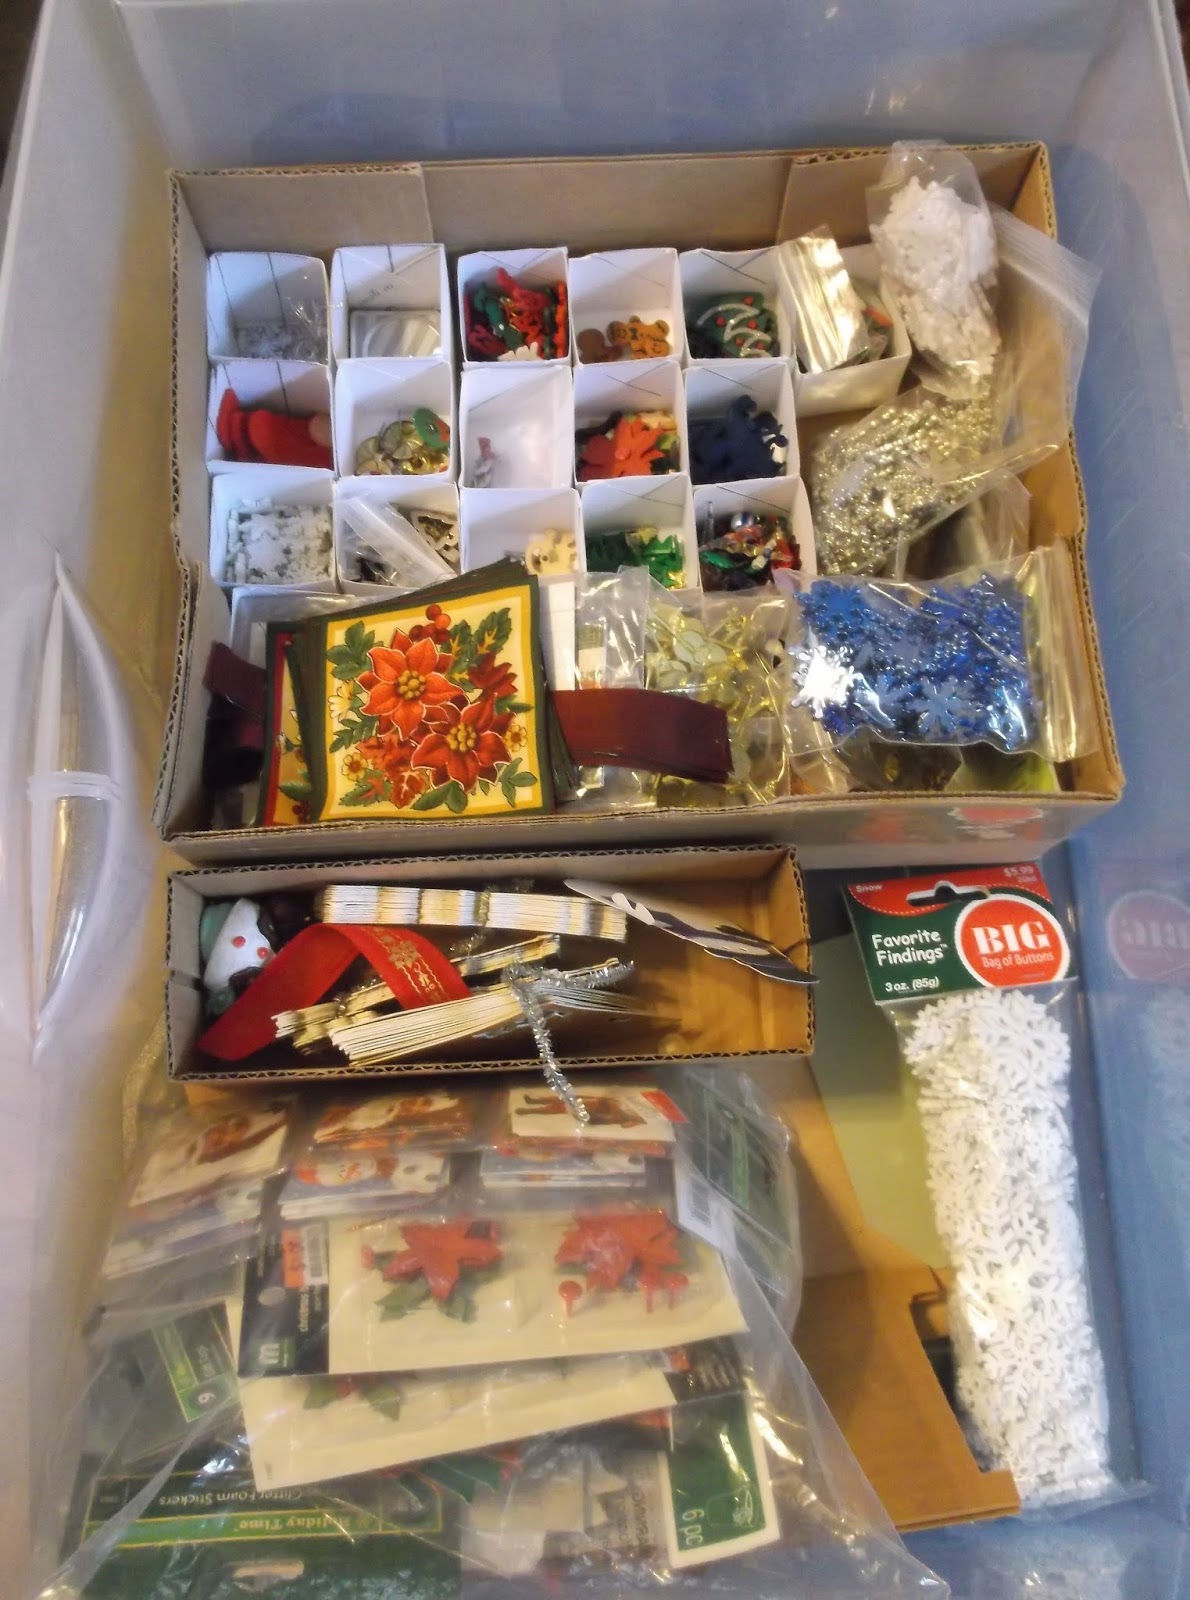
However, since most of my Christmas embellishments are bulkier than a small brad/ eyelet style and I don't have room to store them in the drawers anyway I decided to go the bag route and store them in the Christmas section of the scraprack. Prior to this they were stored in one of those 3-drawer sterilite rolling carts.

I still have those little boxes of smaller embellishments to file but here is how the SR pages are shaping up...


I still have the other holidays to do but I'm running out of pages and I have to spend some time on business for awhile so I'm kind of on a hold for a week at least.

Finally, yesterday I showed you my punch storage. This next picture kind of goes with punches but also would work with scraps.  Whenever I punch something, I keep the negative. This gives me a free stencil to use in my art journals. Even if I only get one or two uses out of them, that's more than just tossing them initially. 


I hope to finish embellishments soon. 
Creative Blessings!
Kel


Monday, November 9, 2015

GET ORGANIZED CHALLENGE Continues


I'm pretty sure Bob will frown at me for posting this picture. But I am so proud of him. He spoils me rotten. Anything I say I need, he finds a way to make it happen. While I do not recall him promising the moon, he does try. 

In this picture, he is designing my punch storage. I had the idea to use this untapped 6' length on the back side of the work island. Hard to believe we built this almost 30 years ago and we never put any kind of finish on the back or ends.


A little wall board, some leftover trim from the room construction and we have a start.

Before I show you the next picture, let me say I do not have as many punches as some of you. Though I am building a stash for specific needs. 


With the exception of the 2 new We R Memory Keeper punches I just purchased, these are all of my paddle and Martha Steward punches. See.. I have room for more! 


We purchased this 3-rack shelf at menards in their closet organization department. The initial plan was to hang 2 of these on the long length of the work island but I forgot to account for that drop-down leaf. So We put one on the end cap to hold all of my SU punches as well as the ones that do not have a deep enough paddle to hang such as the EK Success ones you see in the 2nd basket. 
My challenge will come when I add more of the SU style punches. I might have to put all the minis from that bottom shelf in a bowl on my work table. But for now, everything is at my fingertips as, while I have that space in front of the window in the stamping area, I really prefer to stand when I work and the island is perfect to spread out and really get into a project. 

If you're wondering what happened to Week 2, I did begin sorting the embellishments and I'll show you those tomorrow. I'm spending this week trying to catch up on all of my blog posts. 

Creative Blessings!
Kelly


Tuesday, October 27, 2015

THE SCRAP RACK FALL CLASS - Week 2 Results


SU CARDSTOCK & Designer Paper


Last week, our assignment was to begin sorting our paper. I had most all of mine sorted from the fall class last year in preparation for the move (that took a year LOL).

I have learned through the challenge that I like storing my cardstock by the Rainbow as opposed to color family.  The top shelf is all SU Cardstock 8.5x11. The bottom shelf is GP White, SU Black as well as what I have left in SU 12x12 and the SU Designer Paper (DP).


SLABS

This shelf is all of my Slabs - DCWV,, Paper Studio and Craft Paper. One of the discussions that always comes up when talking about the ScrapRack is 'should I tear my slabs apart?' The best answer is NO. The concept behind the ScrapRack is to store things together that you will use together. Most slabs are a theme within themselves... so you will use those papers together on your projects.  

So that I have a reference of what I have taken a picture of the cover of each slab. As soon as I have an ink cartridge for the photo printer, I will print them out as a 4x6 photo. These will store in the pockets of the Perfect Six page, giving me a visual reminder of each slab I have here.


6 x 6/ 4.5 x 6.5

I will cover these boxes with fabric to match the studio. I'm a flipper and this works for me.


Loose paper by Theme


Divider tab made from a plastic place mat.

Because I don't have a lot of pages per theme, I plan to move these to the ScrapRack in their specific categories.  I am going to keep the Christmas paper stored like this as I have a lot of Christmas papers.

I have pictures of my scrap rack as it's shaping up but they are on my phone. I'll have pictures of that soon.

I can't believe how much more space I have within the studio now that I'm storing about 90% in the ScrapRack.  The key is finding what works for you. I am a flipper so file storage and book page style work best for me.

And because I've accomplished Week 2, I get my Reward...  $50 in my Travel bank!

What is working for you? Please share!

Creative Blessings! 
Kel


Friday, October 16, 2015

FRIDAY FREEBIE - The Scrap Rack Get Organized Challenge Fall 2015!


The ScrapRack Organized Fall Class has begun. Tuesday was our first of six lessons. One of our assignments was to create our Big Benefits Board.  These are the GOALS we want to accomplish over the next six weeks AND set a REWARD for each of those GOALS.

Normally this class is an 8-week course:
     The Basics -get acquainted with the 4-Section System, make our Big Benefits Board and
                           begin to gather all of our supplies.
     Piles of Paper - Create our sorting templates. Sort 8" stack of paper
     Embellishments - Using the sorting templates, sort the embellishments AND 4"-6" of paper
     Photos - Create a Filing system for photos and sort them AND 4" of paper
     Memorabilia - Sort & Label ScrapRack inserts, Sort 1 Container of stuff and 4" of paper
     Stamps & Punches - Catalog punches (including cricut & dies) Sort 1 Container of stuff
     Inks, Pens, Colors - Consider Storage of these & Catalog. Purge ones that don't work
     Crop On! - How to pack for a crop or retreat


I don't know how Tiffany is squishing these 8 into 6 classes but since I've been through this class three or four times already, I have  a handle on a lot of things. I just need to get stuff put into the rack.

My rewards for each of the weeks last fall included:


Although I didn't complete all of the challenges AT THE TIME, over the course of putting the studio together I've acquired all of the items. So this time around I have different rewards.

So here is my Big Benefits Board this time around:


The Big Benefit: Have an Organized, Inspiring Space

Each of the tabs with the crown are a pull-out with my reward for that week. I'm not peeking to remind myself what I get each week, but here are the things I've chosen:

Art Day (this is for week one so EARNED)
$25 Tim Holtz shopping
$100 Travel money
Movie Night
Game Night
$50 Travel

The travel money is important as I am planning several trips in 2016 so starting to stash that cash back now.  And for completing all 6 lessons - something I've never done before, I'm rewarding myself $200 in Travel Cash. 

I'm posting this on our 2011 Get Organized Challenge FB page then hanging the constant reminder to keep me moving forward.

Are you getting organized? Share what you are doing to make your space more inviting and inspiring!
Creative Blessings!


Wednesday, July 15, 2015

WOYWW #319 - Seize the Moment and The Little Bits


Wednesday already?! Where does the week go? This is our weekly snoop at what other artists are up to. We'd love to see what you are working on... or accumulating. Both work LOL For all the details, check in with our sweet Miss Julia at StampingGround. 

This week, I am dedicating my WOYWW to dear Eliza. She left us all to suddenly last week. We were a lot alike. Like me, Eliza loved DOING. She seemed to always be busy. Her creativity and how she saw things always left me in awe - as you'll see from ther latest ATC to Julia when you stop over at Stampin Ground. You will be missed, dear Eliz, but we will continue to be inspired by your artistic legacy and zest for life. Blessings on you journey. 


My desk is full of the stuff from my shopping trip to Hobby Lobby last night (well except for the fabric to the left you'll see tomorrow and the paper trimmer in its near permanent home these days hehe)

The Memory Keeper was on clearance. I now have two - one for each of my granddaughters so I can start organizing their albums. the 12x12 paper keepers is what I went after. Those will hold the SU catalogs I showed you HERE. Aside from the Tim Holtz item I found in the clearance, I found the cute little bits in the jewelry isle. They are from Blank Slate - a category from Hobby Lobby as best I can find. There are ephemera pieces such as miniture playing cards and postage stamps. The whole Traditions line (which Blank Slate is part of) was all 50% off this week.

I also picked up a couple packages of 4x6 pocket pages from Snap only to discover they will not work in The Paper Studios Binder. I wanted them for a seed packet storage album but will have to use these in another project and pick up actual TPS next time I go... yet another unfinished task. :: sigh :::

So what's on your desk? Inquiring minds want to know :-)
Creative Blessings!
Kel