This page planner by The Paper Studio has become one of my favorite organization tools. I can select papers, photos and embellishments for a layout and keep them all in one spot. While I do not go to crops, this is a great way to pre-plan for when you do have time to sit. Flip through your pictures and put them in one pocket, Then, when you go shopping, take this with you. As soon as your purchases are rung up, put the items right in your page planner pockets and you'll have everything in one place when you are ready to sit down to scrap.
On January 29th, I posted about the 5-Dash system for getting organized. You can use these Page Planners to file things together as you are going through your space.
I had 4 comments (one was from Sandy herself so really, you have 1 in 3 chances of winning). So who has won this 3-pack of Page Planner Goodness?
And the winner is:
Random. org refused to load so I put Bobby to work. He needs something constructive to do while he's only 1-arm capable right now. I yelled into the other room and said pick a number from 1-3. He yelled back - 2
Pretty scientific, eh? LOL
That means... Joyce Casaldi has won the Page Planner Goodness! Congratulations, Joyce. I'll drop these in the mail as soon as I can get out of my driveway LOL
In the mean time, I invite all of you to click on Joyce's name to check out her blog. So creative!
Thanks again to Sandy Leigh for her inspiration in this giveaway!
Now, on to the Build Update.
This is all about the lighting. I had two key things in mind for this room. LIGHT and AIR FLOW.
We've talked about my windows... so now let's discuss the lights. I LOVE them!
We have strategically placed 5 of these throughout the room. The diagram I'll show next week will be more precise but basically I have them in the following places:
Over the area of my SU paper storage
Over the office area
One on either side of the center ceiling fan
Over the sofa area
This is a ceiling shot. Bob gave each one their own wall switch. The two on either side of the ceiling fan activate by a wall switch as you enter the studio. Then the others are placed in the wall near their respective light. They cast a great beam without being a glare. Already thinking how to take smaller ones and make a photo box.
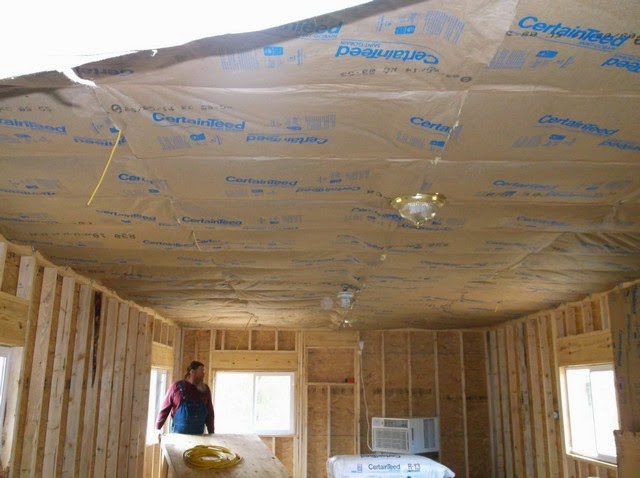
This is the room prior to the ceiling tiles going in. Where that one globe light is in the foreground is where one of the recessed lights is now. The walls also have insulation. That AC unit you see in the background is an AC/ Electric Heat unit. I hope not to use either option much in that room but is nice to have just in case.
One last picture. This will give you an idea of how cold it is out there right now. Bob has a t-shirt, his bib over alls then his insulated flannel shirt on. And although it looks like he's wearing a hoodie, he is not. That's his dark hair LOL I had to think about that for a minute. As you can see by the boxes on the stool this was an early picture when he still had not run all the electrical.
You guys have been asking about the floor plan so I'll have that for you next week.
Creative Blessings!
Kel


Thanks Kelly!
ReplyDeleteAnd look at the progress, I'm so excited for you!
I switched out the standard bulb in our recessed lights to LEDs. I love them! Can't wait to see the finished space.
ReplyDelete