Showing posts with label Birthday. Show all posts

Monday, April 2, 2018

BIRTHDAYS & ANNIVERSARIES

I'm finally on track to share Birthday and Anniversary cards for the month.  I saw a video on YouTube by Dena Rekow on "How to Make Quick Cards From DSP". Shared the video on my WOYWW post last week.

This is one of those projects that exploded into a much larger project than I'd planned based on the DSP I chose to work with. I wound up with a total of 40 cards! I spent one day cutting everything then another day putting the pieces together. While this is a simple layout, if you're going to do a bunch, then it is labor-intensive but you have so many cards done and ready for when you need them.

This would be a great card for a class. Each person could select their own color combination and sentiment. You could have the circles pre-punched to coordinate with each color.

I knew I wanted to use the Fresh Florals DSP from the All Occasions Catalog 2017-2018.


Fresh Florals DSP coordinates with the 2017-2019 In-Colors:


I made whatever I could from each sheet of DSP. I wound up with six of each color combination - fronts and backs. Smokey Slate appeared to be the best background choice. However, I didn't realize I was almost out. Here are all the pieces cut out. I have a few left to put together once I order more of the card stock in April.


I wanted the actual floral for the focal point so used the flip side for the card base mat. 

Then I started stamping the banner pieces from coordinating card stock before remembering I had the ribbon in the In-Colors so I switched. Each color collection has some of the stamped banners and some ribbon banners


In the video, Dev staples her banner pieces together. I chose to do this as well, but felt they still needed a bit of stability. Mini glue dots left over from Paper Pumpkin kits was a perfect fit. I positioned one glue dot towards the far reach of the banner...


then stapled the left end:


After putting them together, I didn't care for the staple. So I got out my 1-1/8 and 1-3/8" scalloped circle punches from the Spring catalog:

Here's one each of all the color combinations:


Here are a couple up close:


DIMENSIONS:

Card base: 4-1/4" x 5-1/5"
Base Mat: 5-1/8" x 4"
Floral Base Mat - 4-7/8" x 3-5/8"
Floral Mat - 3- 1/4" x 4-1/2"
Banners - 3/4" x 4"

STAMPS USED:

Bloomin Love - flower on the Thank You card strip accents
Timeless Textures - flourish on the banner strips

Sentiments from the following:
Beautiful You
Your Inspiring
Eclectic Expressons


Monday, September 25, 2017

COLOR CHALLENGE #6 - Updated!

I know today is Mixed Media Monday but since this card had issues last week, I wanted to get it up today. I have my Mixed Media project in progress and ready to photograph so will have that up for you next week. 


Okay... the die cutting machine is working again and I'm able to play with my toys. That is a really good feeling. While I was able to fill the time last week with other projects, I hated that the blogs were on delay - yet again.

I got the idea for Bob's birthday card from THIS video by Barb Stamps. The inspiration card comes at about the 7:42 mark. You'll see I did mine a bit different.


I put the sentiment on the cup on the outside then left the inside mostly blank. I'll be adding a Bass Pro gift card with removable glue dots to the inside. 

The sentiment on the cup as well as the small heart on the lid are stamped in Dapper Denim.
Inside, I stamped the sentiment in Tangerine Tango on Very Vanilla then die-cut with the heart from Sealed With Love. This was NOT a perfect match, but worked in a pinch. I raised the heart up on a mini-pop dot.

DIRECTIONS:
Stamps - Merry Cafe (SU Holiday Catalog)/ Coffee Cafe (SU Annual Catalog)/ Sealed With Love 
Cardstock - Dapper Denim/ Early Espresso/ Very Vanilla
Paper - Painted Autumn (SU Holiday catalog)
Ink - Dapper Denim/ Tangerine Tango

From the Dapper Denim, cut a base 4-1/4 x 11 inches.
Turn the base horizontal long-ways and score at the 2" and 7-1/2" mark
Fold these up to meet one another and crease.

Top outside panel - cut 1-3/4" x 4"
Bottom outside panel - 3-1/4" x 4"

Cup panels -
Dapper Denim - 3-1/2" x 2-1/2"
Early Espresso - 2-1/4" x 3"

Knowing what I wanted to do, this card came together in just a few minutes this  morning. I already have October's picked out. Now to get the card made before the Vagabond decides it needs another vacation. ;-)
Creative Blessings!


Tuesday, September 19, 2017

COLOR CHALLENGE #6

Apologies for no card yesterday! We had storms roll through then Windows 10 did an upgrade and I couldn't get to my sample. Finally had a computer by 4 p.m. but I have a standing rule of finishing up business for the day so that I can shut down by 5. Unfortunately, that meant catching up on the day job instead of popping in here.  

UPDATE!  There will not be any cards posted until next week. In putting this card together this morning, my Vagabond died... with the plates stuck mid-row. Grrrr. I do not have time to dismantle the machine today as I have a project I MUST get done for my boss.


I promise.. things will be back running to my desired standards soon. Thank you for your patience.

As we were driving back from OK last month I realized I'd failed to post the August challenge! Things were a bit hectic getting the girls ready to go back home. I am sorry I missed posting the challenge. I was just busy soaking up love and hugs to sustain me until we see them next year.

My daughter was born in September and she does love her coffee. Pumpkin Spice Latte is her favorite so I thought this was the perfect color combination to make her birthday card. I'm not going to show you her card though. I'm never sure which of my blogs she visits and I don't want to give anything away. Her birthday is the 26th - same as mine. Now that's a birthday present!


from my Pinterest Board - Color Inspiration

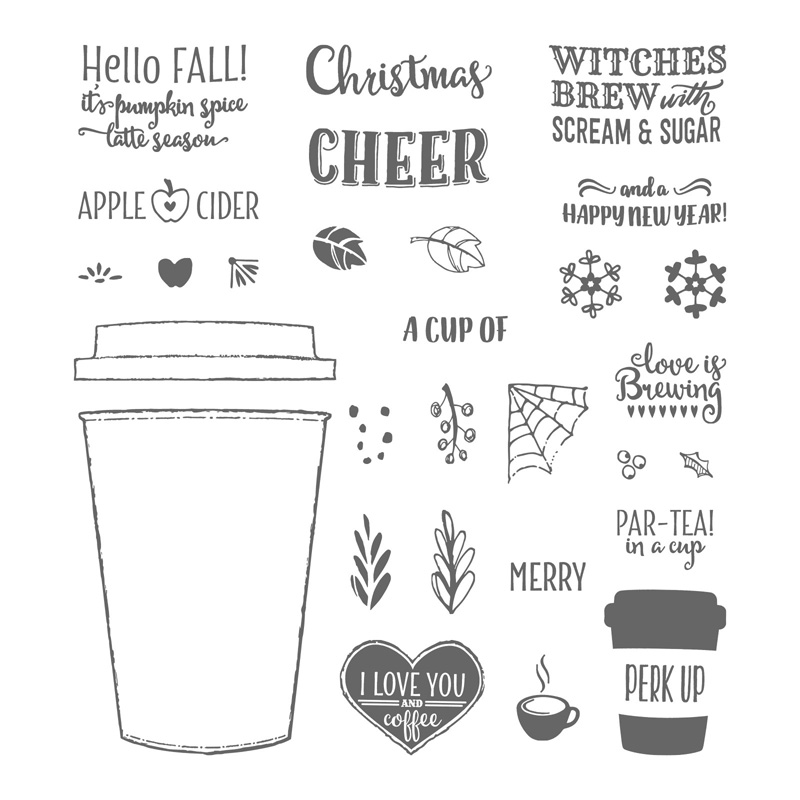
I am utilizing the Coffee Cafe and Merry Cafe sets from Stampin' UP! Merry Cafe is part of our Holiday catalog:
Merry Café Photopolymer Stamp Set

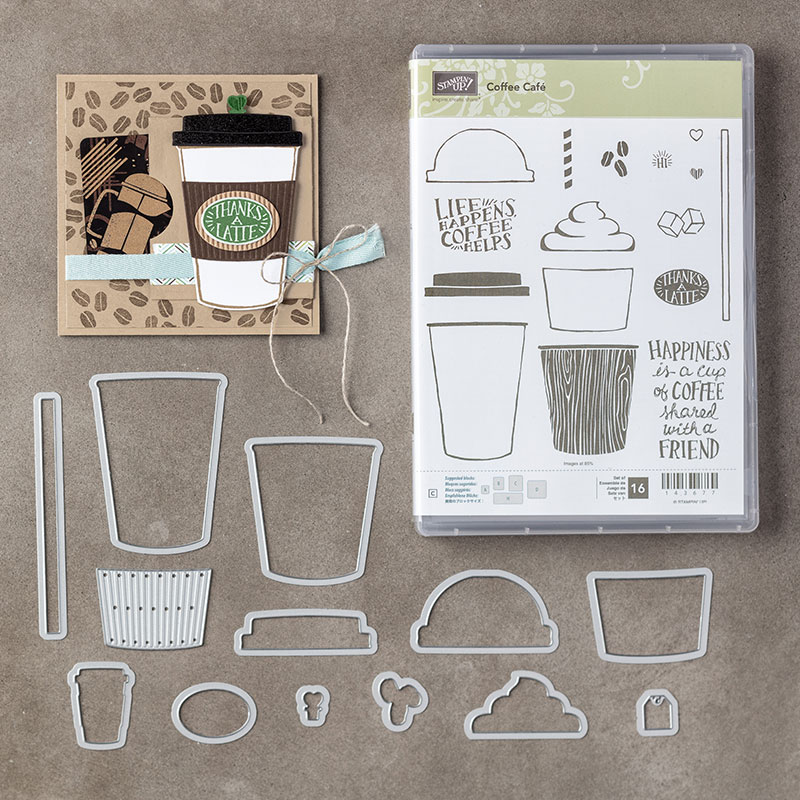
 and coordinates with the Coffee Cafe set in the Annual catalog and the matching framelits dies. 

Coffee Café Photopolymer Bundle

Bob's birthday is in October. Quick funny story. When I first met Bob, he did not drink coffee. The first morning we actually spoke, I offered him a cup of coffee. He accepted and he's been a coffee drinker ever since... to the point of buying an Espresso machine! LOL Here's the card I made for him:

That's mine.. let's see yours! Just add the link to your blog post (not your blog URL but the url to the actual blog post) and Mr. Linky will add you to the list so we may stop by to check out your creation!

RULES:
There aren't any rules. You may use any company product you like. My only request is if you use a stamp or something special, link to the company so we may add to our stash, too :-D

KEYWORD: KCC6 
And remember to grab the Color Challenge button on my sidebar to link your followers here. I'd love to have them playing along!


Tuesday, October 9, 2012

Magazine Monday - Happy First Birthday, Cupcake!

Yep, it's been one of those weeks already. And still so much to do before Thursday.

Today's card was inspired by Jen del Muro. I didn't realize until I searched for Jen's website that she is one of my favorite people at SCS. You can see Jen's gallery of creativity HERE. I always think girly-girl when I see Jen's cards, though they aren't necessarily all pink and frills. Maybe it's her smile.  

In the Summer 2009 issue of Paper Creations Magazine, Jen showed us the Inner Princess. She used several shades of pink CS, paired with dotted patterned paper and scalloped edges to make an adorable 'princess'  card any little girly girl would love to receive for her birthday. The sentiment, from Elzybells Art Stamps (closed in 2010 but may be found on eBay) proudly encourages to 'celebrate your inner princess'.  I kept pretty much everything about Jen's layout the same. She did use a ribbon and bow on the bottom rectangle (below the circle) and 3 pink baubles to the bottom right corner. Since this card is going to my Granddaughter, Abigail, I chose to leave those things off and keep it simple. She turns ONE on the 13th and we know how they like to rip into things then put the pieces in their mouth.


I've always called her my little cupcake. So I chose the cupcake stamp from Studio G. The sentiment is actually part of a 3-stamp wedding set I bought at $Tree several years a go. But any birthday is a BIG DAY for a child.  The cupcake and sentiment are stamped in SU Chocolate Chip. Then I colored in the cupcake swirl with a Brown perma marker and the cherry with Red. For the cupcake liner, I used a Pastel Pink.

The papers and the 'ribbon' trim are from SU - DP Ice Cream Parlor and the CS is ValuCS - Garden
collection. The .card will be a couple days late for her birthday, but then so will Grandpa and I

Monday, September 24, 2012

Magazine Monday - Happy Birthday Sue!


   This week I'm celebrating our daughter's birthday. I'm starting with a simple card. On Wednesday, when she and I officially celebrate our birthday, I'll have another card for her. Sue seldom checks her snail mail so I know even if I were to priority out a card today, it might be next week before she sees it. hehe. She's a busy mom of two working full time. I hope Jeremy does something special for her on Wednesday. She's earned it.
   The inspiration for this week's card - and several others I'm going to show you - came from the Summer 2009 issue of Paper Creations Magazine Card artist, Sarah Small (sorry, couldn't find a blog or web for her) created simple tile cards from Scrapworks Alphabet Stickers. It doesn't get any simpler than that. Peel, place, send.
   Since I'm always encouraging my stamping friends to use their stash, I pulled out my paper stash drawer..

The drawer is approx. 15" square and holds all of my misc. paper scraps from various slabs. This does NOT include my SU DP. I keep that in the SU cabinet with the full pads.

I used the Cricut cartridge Accent Essentials to cut 1.25" scalloped squares. As I began placing my tiles I could tell I should have used 1". However, I'm on a time crunch today (thanks to a thoughtful hubby) and had to go with what I'd already cut.  

The stickers Sarah used were geometric/ contemporary in design and bright colors. The stickers also included pre-stamped words on some of the tiles. I improvised using stamps I had on hand.
I also saw this technique in all patterns of papers for different occasions.  Here's what I came up with:


These are great cards that serve multiple purposes:
1 - Use your stash!
2 - Have quick cards on hand for any occasion
3 - Make multiples very quickly for gift sets
4 - Great simple cards for people you know are going to toss them eventually (face it - they do!)

I'm going to make more of the Christmas design for my 2013 cards. Some I"ll leave plain while others I'll dress up a bit more.

Because many of you have asked about Gelato techniques, I'll be showcasing those on Thursday so make sure you come back!

Hubby leaves tomorrow and I'm back to my routine. 
Creative Blessings


Monday, March 12, 2012

Magazine Monday!

I had a really good weekend. I hope you did too. I spent the entire day on Saturday working on some of the challenges from the SplitcoastStampers VSN that was held on Friday night and all day Saturday.

When I participated in the VSN back in December, I focused on Christmas cards, using the challenges as my guide to get all of my 2012 Christmas cards done. It worked out very well. Each time I opened up a challenge, I figured out what I wanted to do, used a Christmas theme (unless the challenge called for a specific theme) then cut enough of everything to do 10-12 cards of that one challenge.

This time my focus was on Birthday cards. One of the threads I co-mod on SCS is a monthly reminder thread to get our birthday/ anniversary cards out on time. Because I’ve been busy playing catch-up on the business, I haven’t been getting my cards out like I wanted. So I decided I needed to get some of these cards done up ahead of time.

I found this birthday card inspiration in the 4th quarter 2011 issue of STAMPING-STATIONARY-AND-SCRAPBOOKING, an idea magazine from Hobby Lobby. For $1.99 you get a ton of great ideas for card and scrapbook page layouts.

This particular card was under Thanksgiving – not a birthday card. It was a Happy Thanksgiving design by Regina Farrell of TX. I tried doing a search for her without success. I kept her sketch pretty much the same. Where I have 2 sunflowers, she used 2 pumpkins, accented with a couple of green oak leaves. Where I used the Vintage Labels, Regina used an actual tag with Happy Thanksgiving stamped on it, a bit of chocolate ribbon tied in a bow on the tag and a brown oak leaf. Across the bottom of the printed band, she added a row of the brown oak leaves.


I tried just using the sun ‘flowers’ but decided they really needed the stems/ leaves. I used the Marvy Daisy punch for the flowers and the SU Build A Blossom stamp set for the leaves. The green stripe is from a 2-sided paper by Heidi Grace Designs called Baby Girl. In trying to use up stash, I’m using my ValuCS on cards I know will probably be tossed after receiving so I used ValuCS Yellow and Green from their Primary collection as well as SU Garden Green. I used my favorite SU Vintage Labels for the sentiment. The MS Daisy border punch gave a nice country look to this card in keeping with the sunflowers.

Tuesday, February 21, 2012

Teapot Tuesday


This week's TPT card has a destination but not to a specific person. We are sending to the children's ward at a hospital in Schenectady NY. You can read about why this hospital was chosen HERE. Being in the hospital is no fun but to be a child in the hospital on your birthday has to be the pits. This week we hope to change the mood.

We were to include a variety of things... the more the merrier.
Cupcakes
Birthday Banner
Confetti
Balloons

Everyone should be a STAR on their birthday - regardless of where they celebrate it!


I knew the SU Ice Cream Parlor DP was the perfect paper for both it's bright colors and pre-created color pallet. I chose the Pear Pizzazz from the stripe as my base and played with the other colors in the inks.

My cupcake is created from a Studio G stamp, homemade f
lower soft, dimensional gel and bling. I centered it on a scalloped circle then popped it up.

For the banner, I chose my Technique Tuesday 'Message in a Banner' set which I won on SCS last spring. Freebies to work with are always good! I stamped each of the four with a different ink color then matted them on another Ice Cream Parlor DP paper. The letters are stamped with SU Bold Alphabet (retired) in Pear Pizzazz. I strung each pennant from a piece of yellow twist paper and only put the pop dots on the top edge so the pointed end hangs free. The 'ribbon' strip is a sticker border from that same DP pack.


I carried the same ink colors over to the balloons on the inside (stamped with the balloon from SU mini messages -retired) and the sentiment from Whimsical Words.

I hope my card brings a smile to some child's face on a day when they may not have a lot to smile about.

Tomorrow... that baby album I promised you!

Monday, January 23, 2012

Magazine Monday

It appears as if we're to have a beautiful day in the Ozarks. When I get days like this it motivates me to try and conquer the world. We'll see how I do.

For today's card, I have the remake of the card gone bad I had attempted for last week. The card was inspired by 'Funky Birthday' in a 2005 issue of Stamp It! I tried to locate the artist, Julie Medeiros without success.

I stuck with her layout but changed the theme and colors. She had chosen Olive green for her base, deep red for her ribbon strip and the base of the sentiment. Her sentiment was stamped on sky blue and it was used for the base mats on the images. Julie used the present, party hat and cake from Let's Party (retired SU) and stamped everything in a blue dye ink by Hero Arts. The alphabet blocks to spell Happy Birthday were also Hero Arts.


I needed a Valentine card. Initially, I had used the 4x5.5 and the 3 mats, no matter how small I cut them, made the card look crowded. I did not like it at all. So I set it aside and found a new card for last week. But I knew if I played with it, I'd figure it out. When I switched it up to a 5.5x6, it became less cluttered. Though I think it still looks elementary, I'm positive my granddaughter will be thrilled to get mail... especially if I stick a sucker inside :-)

The heart explosion for the background and the heart image on the far left are from Doodles By Design. The other heart is from an old Valentine foam set I've had for years - you know, back when you bought stamps before more refined options came along. The sentiment is my Katie & Co. I'm still trying to use up my ValuCS so I can use those two file drawers for something else. I used Primary Red and Baby Pink. Everything is stamped in SU Real Red.

I'm proud of myself for not trashing the original but instead, making it work. Here's to a great creative week!

Monday, November 21, 2011

Magazine Monday!


I'm squeezing this in as we prepare to get on the road for 3 days in Nashville. Adrian turns 4 tomorrow! Hard to believe. So instead of a typical Magazine Monday, I'm showing off the Birthday Card I made for her as well as the cake.

When I was little, I remember getting a birthday card. I think there was a clown on it. But I remember him holding balloons. Each balloon had a slit in the center to form a pocket big enough to hold a coin. There were different sizes for quarters, dimes and nickles.

Since I was creating multiple pages to this card, I decided to update the technique a bit and use glue dots to place the Chuck E Cheese tokens on each balloon. They'll come off the token easy when we're ready to use them tomorrow. This kid loves to go to the 'mouse'!

I didn't have a mouse stamp but she also likes Pooh Bear and Pooh Bear loves balloons so I thought it was a good match.

I used 2 long cards and put them together to form a fold out. Then I dusted the pages with pastel inks. The 4 is heat embossed in multiple layers of Purple Scepter powder.

I started with one balloon on the front then added a balloon to each page until we got to a total of 4 on a page.


When I saw the cake, I knew it would be one I could create here in MO and transport easily to TN. Because of the 5 hour drive, I chose to leave it in the baking pan and only decorate the top.

I found this cake in the 2012 Wilton Year Book. They have a new product out called Sugar Sheets. You can PUNCH any shape from these thin sheets of sugar. They kind of remind me of the old flat pieces of bubble gum found in baseball card packages. The sheets are 8x11 and come in a wide variety of primary and pastel colors, white, black or colored alphabets, as well as designs like stripes, zebra and hearts. These had to have been created by a someone who scrapbooks... or at the very least pays attention to the crafting industry. Aside from the sheets, you can purchase a punch set and individual cutting inserts. There are 6 basic shapes, then hearts, circles, scalloped circle and star each come in 3 layering sizes. Add 6 different border punches and there is no end to what you can do with these. You can get an idea of what is available and what you can do with them HERE.

The only things I wish I'd done differently were purchase the alphabet sheet (I used my Fiskars ABC template and an Xacto knife) and not glittered the letters of her name as it doesn't allow them to stand out. But I was going for bling! LOL This was the first time playing with this technique. I'll definitely use it again but now when I can't find something to use my 40% on at Michaels or Hobby Lobby, I'll pick up a new punch... for cake decorating!

So I'm closing down and packing the truck. No TeaPot Tuesday or What's only my Work surface Wednesday. I'm going to be enjoying my family for a few days.

Happy Thanksgiving!
Kelly


Monday, September 12, 2011

Magazine Monday


Happy Monday, everyone!

Yep, I have a card and on time this week. I could say miracles happen but truth be told, I needed a card for my oldest sister's birthday last week so decided it was a good time to try and stay ahead of the game.

I'm still pulling from the 2005 issue of Take Ten Studios Volume 4. My card is done almost identical to Kathy Skinner's God Bless America (pg 70-71) She used a stripe stencil as her template to roll the stars and stripe wheel over to create image-stamped stripes on her white background. Would never have thought of that. (I'll have to do a card using that in the near future) She cut her red panel ribbon from CS, sponged the edges of a Stars and Stripes image (SU) and matted it on blue as her focal image. It was very striking and I thought the layout would play well with other images.


I chose to dry emboss my Very Vanilla base with the Happy Birthday folder, I made the ribbon from Anna Griffin DP and stamped the flower basket (Memories of the Heart - SU) I love working with my Derwent water color pencils. For the flowers I chose Light Violet, Deep Cadmium, Copper Beach, Sap Green and Pink Madder Lake.


Bob leaves for his 3 weeks in Chicago tomorrow. My plan is to do the Tea Pot Tuesday before I outline the rest of my very long To Do list.

Creative Blessings!

Wednesday, September 7, 2011

Tea Pot Tuesday and WOWW

I'm squeaking in tonight to post this. I have 2 things to share with you today.

First off, I started the card yesterday as the challenge for Tea Pot Tuesday. The destination of this week's card is a woman who received many

cards last year from our group - for her 108th birthday! Can you imagine? Well, Eula Cousins is an extraordinary woman. Last year she sent a Thank You note to the group and told us a little bit about herself. You can read it here:

I thought someone as special as Eula deserved a special bouquet so I chose my favorite floral stamp, The Stipple Rose - retired from SU.


I stamped the image in Tuxedo Black, water colored the image in Derwent watercolor pencils in Sap Green and Crimson Lake. I masked it off with a oval mat and chalked the remainder of the base in Creamy Caramel. I matted it with Certainly Celery and accented it with Red Seam Binding Ribbon (SU). As a finishing touch, I added iridescent Stickles for a little sparkle.

I need to write a brief note to Miss Eula, telling her a bit about my life in the Ozarks then it's ready to mail.

The other picture today is today's What's On My Work surface Wednesday. The table isn't too bad right now. I'm sure this will change next week once I have the house to myself and am finishing up the album for More Outstanding Mini Albums. For now, I have some Pearl Ex watercolors I made and am sharing with a SCS buddy. I'm going to make mine in the water paint wells (round pallet in the right background)


I doubt I'll be back this week... but you never know :-)
Creative Blessings!

Monday, September 5, 2011

Magazine Monday Returns!

Yep, although it is late afternoon I do have a card for this week. As I told you a few weeks back, I'd selected several 'inspiration' items from the 2005 Take Ten by Stampington. This week I combined MM with my SCS August Challenge envelope from Shell.

Shell's items for us to play with were some stamped images from Clear Dollar Stamps, a couple of mats of DCWV Blossoms and Butterflies paper and embellishments. I decided to get ahead of the game and get my daughter's birthday card done ahead of time. Sometimes I manage this better than others.

My inspiration card is by Jenn Mason. Her concept was Gifting in Ten Minutes... cards that include either a handmade postcard or a gift card. I'll be including a Starbucks GC in my daughter's. Although she isn't a big fan of pink, the color lent itself to the paper I had to work with. She'll live through one year. With a new baby girl due in just 4 weeks, it's not the only pink she's seeing these days.

You'll find a link to Jenn's website HERE and a link to her BLOG For Birthday Kitty, she used a beautiful image of a cat with a birthday hat from Lost Coast Designs stamped to the far right of a tri-fold card. She also used ribbon/ bow to attach the mat on the front of the card bearing the sentiment. I went girly and simplistic with mine. With my daughter, the less froo froo the better.


Because I know this is not a 'keeper' card, I used ValuCS in Baby pink to go with the DCWV DP.
I cut the 2 scoops of ice cream apart and popped the caramel scoop with 1 pop dot and the cherry with 2 pop dots. I also added red stickles to the cherry.

The grandtoddler is here this week so I don't see a lot of stamping going on. Well - except for her. She picked out 3 of her own stamps at Michaels yesterday and was stamping with Grandpa before bedtime... and again right after breakfast this morning.

Creative Blessings