Showing posts with label Journaling By 5s. Show all posts

Friday, April 22, 2016

FRIDAY FREEBIE- Journaling By 5s- Step 3

This week was a learning curve for me. I have discovered my Folk Art paints are my favorite medium for stenciling. The sprays I had were too thin. I will admit to spending more than the 15 min. But when I realized some mediums were not working, I stopped the timer and went in search of new. I probably have 20 minutes total. 

I used a variety of stencils and stamps for this. All the stamped images were done in Memento Tuxedo Black. For stencils, I used some negatives I had of punched images as well as Tim Holtz and Martha Stewart in the mix. 

Here's a reminder of how this started.


I'm really excited about Step # 3 this week. We were to spend 15 minutes adding PATTERN to our pages with Stamps and Stencils.

This challenge gave me the opportunity to ink up some of my art stamps for the first time as well as play with my watered-down acrylics and my Distress Spray Stains. I also found out I have a larger collection of stencils than I thought I had. 


I hope you are enjoying the process as much as I am. Are you playing along? If so, link up in your comment so the rest of us can come have a peek and leave some love.

Creative Blessings!
Kelly 

Friday, April 15, 2016

FRIDAY FREEBIE - Journaling By 5s - Step 2


Before I show you what I came up with, here's a reminder of the Journaling By 5s process. Each step is to be done in 15 minutes... all 20 pages should have something on them by the time the buzzer sounds. That is less than 1 minute per layout!


Step #2: Adding Texture through Collage/ Recycled stuff.

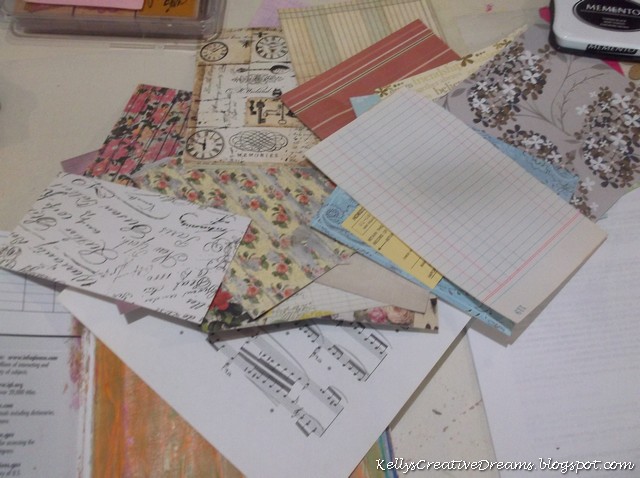
I decided I wanted to use just paper scraps but I have not located my scraps drawer yet. So I randomly selected sheets from 6x6 paper pads that fell into the same color family as the paints I'd worked with. I also grabbed a piece of sheet music. While rummaging, an insurance premium stub fell from a journal. I figured that needed included.

Here are the papers I worked with:


Here is the slide show. I apologize for the pages being horizontal. For some reason, no matter which way I turned them in the file, they uploaded this way into Kizoa. I will try a different photo angle next week.

This slide show has music. Mouse over the video to see the speaker icon at the bottom of the video and make sure it is not muted. 


I look forward to hearing your thoughts on this journey. I'd love to have you join us!
Creative Blessings!
Kelly

Friday, April 8, 2016

FRIDAY FREEBIE - Journaling By 5s - Step 1


I can tell you, the KIZOA flip-through is not very interesting and why I did not feel pressured to get it done. 20 pages of slaps of color not overly exciting LOL. While you will not see the backgrounds this week, I am going to show you the colors I worked with below.

Beginning Tuesday April 12th, I will have 28 days of uninterrupted time to put things in order, update blog posts and play in the studio. I may even have new toys by then.  Thanks for understanding!


This week I tackled Step #1. I'm pretty sure this is the most fun part. Paints and Inks. Can't go wrong getting inky!

The basic concept is you ONLY SPEND 15 MINUTES for each Step. Gather the supplies, set a timer and GO! I can tell you that 15 minutes goes quick. 

Before you see my pictures of the process, here's a quick recap of the Journaling By 5s process:


From this week on, I'll be using a Kizoa video to flip through my pages. I might take on YouTube in the future, but right now that is not in my learning curve time frame. 

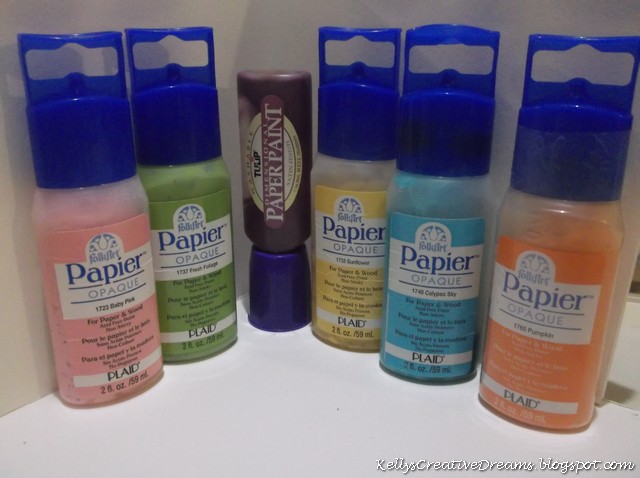
I started with these colors. These are old Papier Paints. Very gloppy.  HERE and HERE are two previous posts I did using these paints. I just can't bare to throw them away. Some, as you can see on the far right, have never had the seal cracked on them.


But once you mush them up with a spritz or two of water and a pallet knife, you have a product you can work with:


They applied nicely with the brayer, I may look at the thrift store for a personal sized blender that I can mix them up in then restore in their bottles so I'm not having to do the mushing process each time.

After applying the paints to my pages, I used multi-purpose art pad from the dollar store to swipe the paint remnants from the craft mat. I got several 'prints' but here's a sample of what was on the mat


Friday, April 1, 2016

FRIDAY FREEBIE - Journaling By 5s - Intro

NOTE:  This post is going to be longer than the remaining posts in this series. This post provides you with background and links as well as Session 1.


For the Friday's in April, I will be walking you through my experience of Journaling By 5s. The concept was created by Texas artist/ blogger/ youTube queen - Shannon Green

The idea is to just open yourself up and allow the creativity flow... in an Left Brain/ OCD kind of way. Boy, does she have my number! Shannon has blended the analytical, step by step Left Brain with the free flowing Right Brain in a fun and short-based journaling project. With Journaling By 5s, you can have a COMPLETED art journal in 2 hours!

We are not talking about something with a theme, or the Kelly Rae Roberts artistic style. This is more about slapping down a wet medium on a page. Then glue and doodle. That's it!

Today's blog post is all about getting started. Here's what you will need for this project:

Composition Journal
Glue Stick
Paint/ Ink
Collage/ Recycle/ Images/ Words Mediums
Stamps/ Stencils
Pens/ Pencils/ Markers

Here is an overview of how Journaling By 5s works:


You do NOT have to use a Composition book. You can use 20 pages from anything. Kelly Donovan chose to use 20 individual pages, which allowed her a bit of freedom when applying  her wet medium in Session #1.  Just keep in mind that if you are planning to use a wet medium like paints, then you want something that can hold up to those. 

If you use a Composition book, you will want to glue 5 pages together, to form a single page. Do this to create 20 'workable' pages. Here you can see I counted the page groupings together and paper-clipped them. Then all I had to do was remove the paper clip and glue the pages in that 'signature' together:


I used the backing sheets from contact paper (left over from all the contact paper I used when putting the studio items together) to keep my groups separate during the gluing process. 


My husband was kind enough to take these photos for me.

After applying glue with the glue, I smooshed pages together to get a good stick.


I now have 20 thick pages to accept my wet mediums I'll be applying next week. Come back Friday to see what colors I work with. That's when the FUN really begins!

Creative Blessings!
Kelly