Showing posts with label mixed media. Show all posts

Monday, April 24, 2023

MIXED MEDIA TAG FOR LineDotArrow Challenge

 Good morning, everyone!

First off, if you saw this last Monday, I made the post forgetting I had one scheduled LOL. Life is always interesting & busy when Bob is home. 

I am part of Natalie's FB group - Line Dot Arrow. Lovely & talented lady from the Netherlands. I'll leave all of her links below so you can check her out.

Each week she offers a challenge. Last week (due the 13th and I just made it LOL) was to create a mixed media tag. She's just starting to play with mixed media and wanted us to explore the medium with her and maybe learn from each other along the way. 

Here's the tag I made:


I sandwiched a 3.5" x 7" file folder tag between two of Natalie's digital tags. Then I took a third digital tag and torn that to create the pattern in the bottom right side. I know it looks like a pocket but I do have the piece glued down completely. I layered a strip of another of her tags on that then added a fussy cut image from the same tag as the triangular piece. The oval at the top is from her digitals as well. I used all of her free digitals from the Facebook group. I want her SPRING BLOOM COLLECTION but waiting for money to transfer to my paypal. The laces as well as the burlap, leaf and tag tie were all from my stash. I made the dangle from part of an actual dangle attached to a wrapped paperclip. Both the wrapping and the 'thank you' were from one of the digital sheets.

Mixed Media can mean different things to different people. For me I think pattern, texture, fabric/ lace, metals. I would like to have added some texture paste/ stenciling but last week was crazy and I didn't get to the FB group until Friday - when the challenge was due! LOL But that's pretty much how I roll most of the time. 

Here's her video for the Mixed Media Tag:


Our next challenge is to make a stuffed Paper Bag. Not sure what that entails? Check out Natalie's video as she begins constructing hers:


You will find all of Natalie's links via her linktr.ee

I hope you'll come join us!

Creative Blessings!
~Kelly

Wednesday, January 4, 2023

#KCDJANJJ23 Challenge - Week 1


Good morning!

As I set up this post I realized I had not posted the details about my monthly challenge here! I was sure I'd moved the video over. 
I've been busy, to put things mildly. I've spent the past four days cataloging over 30 paper packs from Stampin' Up! that never got cataloged - over the past 2.5 years!!! Geez. Was way overdue. That project is done and I now at a flip through my binders what paper I have. 

So quick note, I'll leave 2 videos today. The first will be the Monthly Challenge details and the 2nd is of the stick pull for Week 1.

Basically, we're doing a month - long challenge with your base colors being BLUES, WHITE, SILVER (or gray).  Then each week, I pull an art stick and that is one of the items you're to make. You have all month to complete any part of this project. Choose to do the ones that excite you and skip the others. No minimum requirements... just have FUN!

Challenge video with complete details:


Week 1 item:


I'll be back tomorrow to show you the 1st item going in my shop.

Creative Blessings
~Kelly

Tuesday, May 31, 2022

GERMAN SCRAP CHALLENGE - Photo Heavy

 Hi everyone!

I do apologize for not getting the Card Chicks card up last week as planned. After Bob left, I pretty much just dosed up with Nyquil and slept most of the next two days. By the time I felt better I had to start busting out a challenge I signed up for with Spectrum Art Creations. You'll be seeing me playing with more of things I've purchased from them in the coming weeks/ months as I turn my attention away from strictly Stampin' Up!

If I learned anything from this challenge, it was that I am so much more inspired when I can play with the toys I WANT to play with rather than the ones I HAVE to play with. My Stampin' Up! business isn't going anywhere so it's time I started enjoying the creative process again.

So what is German Scrap?

Scraps are small paper images printed lithographically. They have been produced in America, Germany, Scandinavia and more recently England. The German printers were the finest and most prolific producers of scraps in Europe - queensferry-at-war

Here is the sheet I had to work with:


For the challenge we were to incorporate the images into 5 different items. The 5 items counted as 1 entry for a chance at gift cards to Spectrum Art Creations store.  I'll be doing a video for Friday but for now, here are pictures of the items I made with a bit of description:


Inspired by vintage photo albums. The cover is 2 layers of Warm n Natural quilt batting on chip board then covered in an olive green velveteen. 
The doily is a  coaster crocheted by my late eldest sister many years ago. We never use the placemats/ coasters anymore so I've decided to incorporate them into keepsakes. The corners are Tim Holtz.


Inside of the album. This is one of five photo pockets I made. Each pocket holds 2 'photos' back to back.
The pockets were made from coffee-dyed Crumb Cake cardstock. I used a retired SU set - Very Vintage to stamp part of a doily beneath the banner (a Darice die) as well as the florals in Tip Top Taupe.
The photo mats were Very Vanilla cardstock lightly coffee dyed.
The images in the album are all Tim Holtz paperdolls

This piece is dedicated to my eldest sister - Barbara.
She loved roses and a true cowboy pistol she'd purchased a few months prior to her death.

I've been wanting to make an altered paint brush for about three years. This challenge was the perfect opportunity to step out of my comfort zone. 
I started with two coats of gesso then added a couple coats on the front of Tapioca acrylic paint.
You can see half of one of the coasters and I've done a pearl trim wrap.
For the floral, I chose the basket arrangement, photocopied the image five times in black n white onto cardstock then layered them up to create a 'chipboard' effect - this added dimension to the piece.
The pistols are a charm from CHARM ME that I purchased at Hobby Lobby.

This is a TAG BOOK

inspired by Jennifer Tritle. Her tag books are showcased in the April/ May/ June issue of 

Art Journal magazine by Stampington

You'll find her article beginning on page 48.  She was inspired by 

Jessica Rosengren (Jesson Art on YouTube)

While Terri was here, one of the things she brought me were several unused time cards. The were 14" long. I knew I wanted to use them as the base for the tag journal. Then following Jesson Art's tutorial, I got brave and played with layers, using gesson, Shimmering Embossing Paste (Stampin' Up!) and Pigment Sprinkles (retired SU). I used the Tim Holtz rose doily stencil. The ribbon is Stampin' Up, the lace and pearls from Hobby Lobby. 


This is a Gildan white t-shirt. 
I applied the German Scrap with Fabric Mod Podge, making the t-shirt washable. I added half of a coaster trimmed in what I call Barbara Pink ribbon (Stampin' Up!) Barbara always wore a beautiful bright pink nail polish.  The neckline is a loose wrap of the pearls and ribbon tacked into place. 


The last Sunday of each month we play TRINGO Live on YouTube to celebrate that month's birthdays. Anyone can join us!
We call it Tringo because it's a mix of Bingo interspersed with Trivia with Madison.
One of our regular members has a box she keeps her bingo card/ markers in. She inspired me to create a Bingo Box of my own. 
The box is made from 2 canvas frames ($ Tree), decopaged with coffee-dyed music paper. I distressed each torn piece of the music paper with Tip Top Taupe (retired SU). I took a bingo card I had in my game elements stash and shrunk it to 75%, layered it on a piece of thick chipboard to add dimension, then placed one of the German Scrap items on top. 
You can see other German Scrap elements decorating the corners. I applied them to all 4 corners with the box shut. When the glue had dried, I slit them with the Xacto knife so the box would open again but they'd look like one piece when closed. I use 2 vintage bingo markers stacked together to for the feet for the box.


BINGO is spelled out by cutting 7 layers of each letter out of cardstock (using Sizzix adhesive sheets) then adhering them together to create thick chipboard letters. The top layer is gold foil.


I lined the inside of the lid and bottom with chipboard covered in Garden Lane (retired SU)
I created a bingo card from the one Madi has for me. The squares are 1" then I stamped the numbers/ letters using Garden Green and retired SU stamp set - one of the first things I ever earned with Host Credits years ago. 
I'm using flat-backed glass marbles from $Tree. There re 5 clear ones to use for Wild numbers so I can see what's below them, a dark blue to cover the free spot and green for the rest of my markers. 

I'm exhausted but it was so much fun playing with lots of different mediums and stepping out of my comfort zone to try new things. 

What have you been wanting to try? Take the plunge and have FUN!

I'm off the rest of this week but should be back on track Monday. Thank you for your patience.
Creative Blessings!
~Kelly




Friday, July 3, 2020

FREEBIE FRIDAY - June Just 15 Junk Journal Flip-Through

Happy Friday, everyone!

This morning has seemed more like Friday the 13th. I'm not normally superstitious about that day but man... this day started out rough.

Sinus headache - check
AC in house not working - check
Wrong video uploaded to YouTube - check

The cherry on the top of that three-layer cake is that I still can not find the spiral notebook I took to Springfield lasst week. I have everything - including the planner I was using with the notebook - but not the notebook. Thankfully, nothing in there I can't recreate with a bit of peace and quiet. Man, I miss my coffee shop!

Okay, on to today's video. I was a couple days behind on finishing this journal but am okay with that. For the most part, I got to include everything I needed. 
Here's the video:


I've already started the July Junk Journal Challenge by setting up for videos for each of the eleven elements required. My kit video will go up on Monday

You can jump in on this one. This month is all about using things you would normall 'discard'. Check out Julie's details video HERE 

Friday, January 31, 2020

FRIDAY FREEBIE - #JJJC2

Good morning, everyone!  Happy Friday!!

Today, I'm doing the final flip-through of the January Just Junk Journal Challenge 2 with Dearjuliejulie.

I wasn't sure at first if I was going to enjoy this journal but after Bob gave me a pair of his jeans I saw a vision for what I wanted the journal to be... and its use.

A lot of people ask, what do you use a junk journal for? The answer is simple:

Whatever you would use a journal for... to write in, document, keepsakes.

For me, this journal will go with me as I travel the Ozarks this summer. There is so much history in these hills and I intend to find as much of that history and preservation as I can. I'll make notes, tuck in pictures and brochures along the way.

You can follow that journey, once I begin, at An Ozarks Journal

I'll be back Monday to share our challenge specifics for Febuary!

In the mean time, here's the video:


Monday, September 2, 2019

MIXED MEDIA MONDAY - August Altered Junk Journal Challenge

Happy Labor Day, everyone!
I hope you're having a wonderful day. Warm here but not uncomfortable. I have doors/ windows open to air out the house and am in deep cleaning mode of the laundry/ kitchen. This is the first week of the month task.

Okay.. enough about my house cleaning habits. You're here to see what creativity I've been up to.
Late on Saturday I finished the basics of my August Altered Junk Journal Challenge with Dearjuliejulie.  For my book, I chose to alter a book about the Rocky Mountains. This will be my travel journal when I finally get to go to Colorado.

Here's my video. I hope you'll leave a comment either here or on the video as well as subscribe to my channel (soon to be changed to KellysCreativeDreams.

Please note, apparently I say 'July' in the video. This really is AUGUST! lol Thanks for watching!


Monday, February 4, 2019

MIXED MEDIA MONDAY Returns! Whispers Of Me

Over the past few days my sister and I have been watching endless runs of art journaling videos. Ones we've been most captivated by LorriMarie Jenkins. Check out her channel if you really want to be inspired. She takes you through step-by-step through a series of videos for EACH project. For now, I'm on Altered Book #2. A lot of the things I already know but I just love watching her.

The videos have inspired me to pull out an ancient project and get it finished! You can read complete posts about the Whispers Of Me project

HERE and HERE


If you read the posts linked above you'll see I started this book about 14 years ago as a teaching venue for a class I was teaching. That's a LONG time to have a project in process.... and not going anywhere. As I look at the picture, I'm not sure I'm happy with the cover.. or some of the project itself. I'll know more when I look at the book later this week. I may wind up rescuing pages from inside and starting with a fresh book. Because I started this as an alphabet book (this was an old dictionary), I'll need to be able to incorporate at least 26 2-page spreads. But then again, maybe just 1-page spread per letter will work. 

See, I don't think I was happy with the direction the book was going and may be why I stalled. 

To see more pictures, check out the second link for sure. There are a couple in the first link where you get more background. 

I will be working on two Mixed Media projects for this month. The other is a February Fabric Junk Journal Challenge. Look for hashtags on IG - #FFJJC to see all the creativity. You can also jump in. Watch the video below for all the details.  I'm not sure how much of it I will do as I still have a book to finish writing but I really want to play in this one so we shall see.


I have cards to get done so should have something tomorrow. I've finally begun to find my desk!
Creative Blessings!


Wednesday, July 11, 2018

WOYWW 475


Good morning, friends. 

Another hot day in the Ozarks is on tap for today. I really need to do some more yard work but that might have to wait... again.

My desk is the leftovers from a Christmas card I made for the SU blog yesterday. You can see it HERE if you'd like to peek. Not  my best work but limited on current Christmas until my order arrives today.  The card was for our Team Color Challenge. I need to get link up with my team leader today. Deadline is tomorrow. LOL

Also, for my mixed media friends, instead of cleaning my desk, I did a serious cleaning of my art area. You can see that post from yesterday HERE.

I have today's card to get up and will be linking up with the 52 Christmas Card Throwdown. I got home too late last night to get the card made so that's next on my list. Good thing is, once I get something in my head the reality comes together pretty quick. I'll be using the Snowflake Sentiments set already on the desk. 

Speaking of challenges. This is VSN - Virtual Stamp Night weekend at Splitcoast Stampers. We start at 6 p.m. CST (?) on Friday night with 4 challenges posted - one each hour. Then we'll kick in again around 11 a.m. CST (?) on Saturday and go through til 9 p.m. with a new challenge posted each hour. We'd love to have you join us. HERE's a link to all the details. Sharon aka FoxyStamping is usually one of the challenge hosts. I'm determined to play this weekend.

That said.. if you want verification as to what a crazy woman I am, I invite you to check out THIS post on my author blog to see what I'm up to the next 8 weeks. Bizarre doesn't begin to describe what I have on my plate.  Don't let the content warning on the first page scare you. Unless you go back a couple of years, there isn't' anything risque. That is partially up there as a safeguard to parents against young people looking up 'romance' hehe. 

Okay.. done babbling. 

That's it for my desk this week. Who's Miss Julia and why am I here?  When you are done visiting me in the Ozarks, please hop on over to Stamping Ground  for all the details. Miss Julia has a long list of other studios you can peek into. No standing on an up-turned milk pail to look in the window. We open the doors wide and welcome you.  Please leave your number and you'll be among the first on my list. 

Creative Blessings!
~Kelly

Monday, July 9, 2018

MIXED MEDIA MONDAY - An Organized Space

Good morning, everyone!

While I hope to be playing with projects soon, I decided the mixed media area first needed a bit of clean up. I don't have before pictures. Didn't think about them. I just dove in. But I'll explain with the first picture.


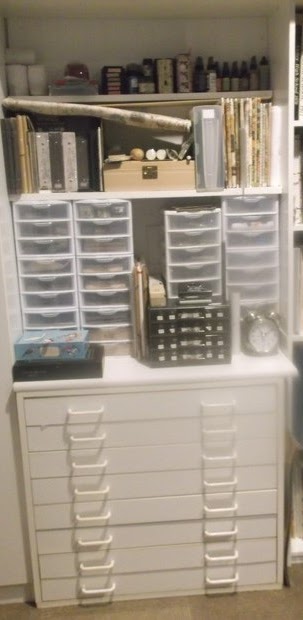
This is a full shot of the mixed media corner. Left to right: paint storage, wrapping paper stool (with casters making it easy to move out of the corner) a 2-door cabinet that houses most of my texturing supplies, blank journals, geli plate, etc, main mixed media storage, art books.

Before I started I couldn't open a single drawer without moving something. Getting to the cabinet required LIFTING the stool up over something then reaching over to open the doors to get what I needed.  This is MUCH nicer, don't you think? LOL

So, spot by spot:


I apologize for the bit of glare. Very sunny day. :-D
The main part of the paint storage is an old stamp display shelf unit from Michaels years ago when I worked in Peoria, IL. We got to pick them up for $20 a piece. I was out of town at the time but a good friend/ co-worker put my name on one. She figured if I didn't want it, she could take it. I thought that very sweet of her. The filing cabinet below holds various types of applicators in the top drawer, while the bottom one is full of all kinds of receptacles and palette trays.


Next to the bookcase, this is probably my favorite part of the entire space. The bottom 8-drawer unit was picked up at an auction for $5. I think it's an early Ikea peace. The top drawer holds larger Tim Holtz items, Drawer 2- tissue paper, Drawer 3 - packaging paper (like they wrap the breakables in at Hobby Lobby), Drawer 4 - Chip board, Drawer 5 - Mat board, Drawer 6 - foam core, Drawer 7 - manilla folder type weight and Drawer 8 - card board.  If the drawer is full, I don't keep any new coming in. I use it or recycle it.


The 2 towers on the right hold all Tim Holtz embellishments by theme. The bottom cigar box on the bottom holds bands Bob saves for me and I've not decided what's going in the top one yet. I've had that blue cigar box since I was 12. 

Bob found that little black drawer unit on top at a flea market. It was originally from an auto parts store. There are 4 drawers. I'm using them to store small alphabet/ numbers/ symbol keys from laptops/ keyboards.

The 2 towers on the right hold misc. assemblage (similar to TH) from other companies like $ tower baskets at Michaels, etc. The alarm clock no longer works. I got it at a garage sale for $1. I figured when the mechanism stopped working then I could do a scene in the inside ala Tim Holtz style.


Bob added these two shelves for me. The first one rests on top of the towers. I have TH books, fabrics, journals, papers. The jewelry box holds mostly keys/ locks. The top shelf is mostly TH. Though the white rolls on the far left are snake skins from our resident Black snake. One is over 8' long! I plan to bleach, die them in mixed media. 


Finally, my art journal/ art book shelving unit. A bit of glare form the sun. The window to the right out of the picture is 48"w X 36" h. lets in tons of light over my altar.

Top shelf - class yearbooks, weight loss I keep for reference, Tony Robbins complete motivation set, smaller journals

Second Shelf - handmade journals from past years, journal prompt books. The picture in the front on the stand was given to my by my upline when I sold UnderCover Wear. 

Third Shelf - art books such as lettering, altered art, workshop type books,

Fourth Shelf - the blue binder on the far left is all of my OneStroke practice books, then a basket of art papers such as water color pads, graph papers, etc. The rest is Writing prompt kits such as the Writers Toolbox and 12 Secrets of Highly Creative Women

Bottom Shelf - all art magazines I've kept for various reasons.

My goal is to keep all of this accessible so I can finally begin making art. I do have a large file box that will probably sit on the floor in front of the book case to house all of my magazine clippings. That project is still needing done. Also my 12x12 scrapbook binders that latch for holding mixed media pieces from packaging. I have 3 of those. They are easy to move as they all snap close and have handles, similar to a suitcase. 

Next project is to put my antique wardrobe back in order with Spiritual supplies then start on the office corner.

How do you keep your mixed media supplies in order? Do you bother? Are they mixed in with everything else you do in your studio? I'd love to know.
Creative Blessings!
~Kelly


Monday, June 25, 2018

MIXED MEDIA MONDAY - Crazy Brave


Okay, so the pages are totally out of sync from the month they were supposed to be. POWERFUL was actually the March challenge but somehow they didn't wind up in my book in the correct order. I think I'll try something different next year.

But anyhow... I like that this spread is about choice. That having GOALS, knowing what I want to accomplish is one thing. Regardless, there will always be obstacles or nay-sayers. How I CHOOSE to work with them is entirely up to me. 


While I'm not crazy about how this spread turned out, I am happy with the message to myself

I CAN exceed Expectation, I can determine how I work with my strengths and weaknesses to ACCOMPLISH my GOALS.. and I need to GET TO WORK if I'm to meet those goals.

Bob is only home a few more days so I'm off to be Crazy with him while I can. ;-)


Creative Blessings!


Monday, April 30, 2018

MIXED MEDIA MONDAY - Crazy Brave


Somewhere along the line, when I put the book together, I got calendar pages out of sinc. This was supposed to be February's prompt. Given the subject though, I think the challenge fits any month of the year.

New Years resolutions are great when we make them. Goals are even better. The plan is to make this year the one where I am UNSTOPPABLE. Even though I may drift from my goals, I don't have to abandoned them all together - I pick myself up and get back to work. Falling off the wagon doesn't have to be permanent - unless I CHOOSE it to be so.

Well, I DO NOT choose that path. I'm stubborn that way. What I want to achieve may take a little longer but I believe in accomplishing what I start out to do... no matter how long.


Not the best picture. I just could not seem to get things in a flow yesterday. May have something to do with my first Monday with Bob back home. I did find my larger doll stamp and used her this time on a 2-page spread. My husband was quick to point out that my shoes are going the wrong direction... well, they weren't for the stamp! LOL Maybe I'm going to make this journey backwards. 

The shoes mark the path along the calendar year. You'll see that I have a GOALS image along the way - reminding me that if I'm not where I thought I'd be, I can readjust and KEEP GOING! There are several signs along the way reminding me DON'T Stop. This is part of My Story at the end of the year. The SUCCESSES, Stumbling Blocks and Drop-Off's along the way all make up MY STORY. 

You'll see a rainbow in the top left of the My Story image, then there's a smaller sticker. This is left over from my UndercoverWear days... a motivational sticker by The Booster.  The sticker says:

LIVE YOUR DREAMS

After I had all of the elements in place, I just played with my Recollections Watercolors. 

This isn't one of my best spreads but the message is there in spite of having an off day. 


Monday, April 9, 2018

MIXED MEDIA MONDAY - En Masse Journal

Good morning, ladies.

I'll be back around noon with a progress picture but I wanted to get something here so you'd know to come back. I should have been working on this post yesterday but I was busy clearing off the work table. The space needed cleaned/ reorganized and I'm still on the hunt for those dies.  4500 steps later, the work table is completely clear. I'm going to glue the junk journal pieces into place, take pictures then load them on Kizoa. I should have that all done by noon.


In the mean time, if you con't remember the En Masse Journal, click HERE to go to the original post.

This is the pile I've been collecting for the past week. As I came across something, I clipped the item down then tucked it into the journal so I wouldn't lose anything.


I started by dividing everything out into categories:


Window Envelopes.
I don't include the whole window area. I just like the different insides. So I punched them out with my Fiskars Octagon punch.


After gluing them in, I realized I had two pages for this. One has them punched out with the banner punch. Not sure if I'll combine or just fill both. 

I did the same thing with company labels:


After gluing them all onto one page:


I realized I had separate pages for food labels and company labels. Oops. Oh well, they will fill up fast.

Postage stamps:

Became this:


While this might seem like an odd project to some people, this is an interesting way of documenting a life. With a flip-through future generations will see the type of products we used, stamps, and all sorts of ephemera that show how we lived, what our interests were, etc. This is our Smithsonian. :-D

Creative Blessings!


Monday, February 26, 2018

MIXED MEDIA MONDAY - Crazy Brave!

I'm doing my best to stay on track. Aside from my day planner to keep me focused on the various challenges and art projects I want to participate in, I have an art planner where I list just challenges. To make sure I don't miss anything I have a monthly write-on/ wipe-off board so I always have things in view when I walk into my studio.


This week, we step into the Crazy Brave & Wicked Strong calendar. I'm not going to worry about whether or not I'm in the current month. Rather, I just want to enjoy playing.

This January spread talked about our Journey or Course and how we navigate the road blocks and turns helps form the outcome. I thought the quote I chose worked perfectly, as well as representing the twists and turns in the flourishes


This Prima doll stamp will be a constant in the layouts as I go. I used Stampin' Up! Stampin' Blends as well as the Watercolor Pencils to color her as well as the leaves. The flourishes is from Stampendous - Flourises v2. The flowers are from a retired SU stamp set 'Morning Meadow. I drew in the leaves with an Old Olive watercolor pencil.  The quote isn't really visible and I'm not sure where the stamp set is from - after a google search I see that some, but not all of the stamps are from Tim Holtz.

The quote says... 

THE 
JOURNEY
IS NEVER
TRULY
OVER IT
JUST
CHANGED 
COURSE


Monday, January 29, 2018

 Last year, I came across a calendar by Suzy Toronto. Check out her website - lots of FUN stuff and great gifts!

The monthly pages were just as colorful as the front cover and each month contained a full calendar page as well as an 'empowerment' type of thing. Well, the 2017 calendar is still on my shelf. I didn't use it last year because I'd lost track of it... finding the item about August as I was doing the deep clean. Then I found a 2018 and decided THIS was the year I would play.


Here's a sample of one of the inside pages?


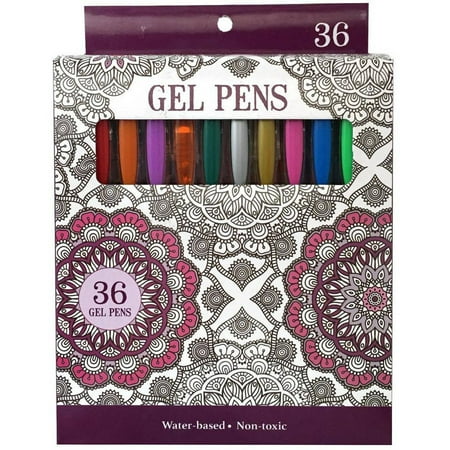
I wanted to combine this fun calendar with thought provoking messages with the lovely set of 36 Gel Pens Bob got me for Christmas. You can order them through the link but Bob found mine at Walmart.

Leisure Arts Gel Pens, Pack of 36

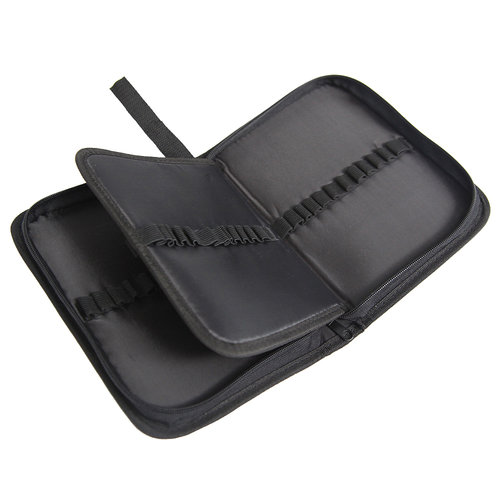
I've already ordered a pen case from Scrapbook.com  I have one of these cases for my planner pens. The case holds 48 so I'll have room to add my white signo as well as a couple of black art pens, a graphite pencil, sharpener and eraser. 
Pen and Marker Organizer

I wanted to turn this calendar into a workable art journal with 2-page spreads. The only paper I had was a 9x12 Watercolor pad. I cut the pages down to 6x12", cut the calendar pages in half and coil bound everything. I bound each 2-page spread with a paperie tape from ms sparkle and co. I'm not happy with the tape but we'll see how it holds up.

Here's a blank spread:


In the finished journal:


I just got this idea last night so I don't have a spread done for this post but I'll double up somewhere throughout the year.

Since Mondays are primarily Mixed Media, I'll be showing the current month spread on the last Monday of each month. That gives me the entire month to work on each layout a little at a time


Monday, October 23, 2017

MIXED MEDIA MONDAY - En Mass Journal Returns!

Back in February of last year, I told you about a Junk Journal project I was starting - En Masse Journal. You can see the first post of how the journal began HERE.
The next post went along rather smoothly and on time (gasp!) HERE.
From there, I'm not sure what happened but the journal never made another appearance - because something got in my way (surprise surprise!) and I never got back to it.

So out it came for this week. Originally, I'd planned to run this the 4th Monday of each month. So I think I'll stick with that.
So here we are - October 23rd and I'm diving into one of the color sections of the Journal.

Originally, I had punched out all of the tabs for the journal, but had never sat down and labeled any of them. The initial pile looked like this:


I went to add them to the journal last week and they've vanished. Something in the back of my mind says I threw them out when I was decluttering the space, not realizing what they were for and determined that when I remembered I'd just re-punch them... so that's what I did. 

But this time... I labeled them and put them in place in the journal.. allowing a 2-page spread for each.  Here's a shot of the new tabs in place:


I used the tab punch as I had before for the categories. But the COLOR and ALPHABET tabs were punched from the new SU set  TABS FOR EVERYTHING from our current All Occasion catalog. I used Recollections cardstock for the colors. The letters were stamped using a retired SU set - Collage Alphabet, which I purchased from my stamping friend, Maggie  (aka Maggie's Cat House blog)

While I've not actually begun working in the journal, I can now that the categories and colors are in place. Each 2-page spread is interpretive. I can play however I want. 

I'm going to attempt to list the categories here - in no particular order just in case blogger throws me a curve in posting:

Circles, Finger Paint, Animals (wild), Tea & Coffee, Paper Dolls, Tags, Yarn & Fibers, Postage Stamps, Stars, Business Cards, Zippers/ Fastners, Textures/ Rubbings, Cowboys/ Western, Squares, Photos, Punches, Fabric, Washi Tape, Store Receipts, Faces, Triangles, Hardware/ Washers/ Gears, Glitter/ Sparkles, Colored Pencils, Buttons, Lace Doilies, Song Lyrics, Horse & Tack, Candy/ Food Wrappers, Quotes, Labels, Woven Paper, Markers, Rectangle, Leaves, Paper Scraps, Beads, Flowers, Crayons, Lists, Window Envelope, Security Envelopes, Dogs, Cats, Fruits, Vegetables, Birds, Books.

Then I added Holidays/ Seasons because I had pages left over in the signatures:
Snowflakes, Time, Valentine's Day, St. Patty's Day, Easter, Halloween, Thanksgiving, Christmas, Wedding

As well as things I love:
Planners, Baby, Teddy Bears, Negatives, Flags, Witches, Water, Football, Hearts

There are also 4 FREE pages to whatever I might find that would make a good category.

I'm enjoying playing again.

First off, I apologize for falling off the wagon on the 13 Days of Halloween. I just ran out of time. I had the projects but could not get them posted before I had to focus on packing and leaving for the conference. Then my BIL/SIL visited for a week. Rhonda and I spent the best part of two days in the studio. I managed ALL DAY on Thursday where I put together my October Daily album together from start to finish! Well, except for actual inclusions - but the base of the book is done. I'm still debating whether to use it for this year or put it away and I'll be ready to go next October. We shall see. I'll keep you posted.

Creative Blessings!
Kelly


Thursday, March 31, 2016

TECHNIQUE THURSDAY - En Masse Journal


Before we go further, if you missed my first post about the En Masse Journal project, you can see that HERE

This is the massive amount of tags I punched for the En Masse Journal. There are 60 white ones and one of each color. They did not take long to punch... only about 15 min. I also scored them so they will fold.

I took the white ones from my white CS scraps:


Since it's a scrap journal, I couldn't see punching them from good white CS. These were a blend of shades. 

The journal itself, came together nicely. 

In this picture you can see the 4 black dots which were my stitch holes. I used waxed, non-flavored dental floss to stitch. Looking from Left to Right, I came up hole #1, down hole #2, up hole #3, down hole #4.. then reversed the process working my way back to #1. I did this with each of the 4 signatures:


Since I could not get that AWESOME travel journal cover Shannon Green was lucky enough to acquire, I painted mine a Chestnut brown, then covered it in brown packing tissue paper I had scrunched up into a ball then flattened out. After gluing the 3 pieces in place (one on the front and one on the back plus one over the spine area to seam the whole thing together) I then ran TH Walnut Stain Distress Ink pad over the cover, letting the raised areas pick up the ink. I heat -set that with my heat gun. I finished off the edges with masking tape.


I'm really happy with how the journal came out. This is my first stitched journal. I haven't decided if I'm putting any kind of a focal on the cover or if I just want to use twine and a conch shell as a belly band. We shall see as I begin putting things together.

Come back May 5th for the next installment. I'll have all of my tabs in place and can share my Journaling Prompt List with you. 

Creative Blessings!
Kely

Monday, January 5, 2015

MIXED MEDIA MONDAY - Documented Life Project


I am on track to begin the Documented Life Project through Art to the 5th with the rest of the group this year... instead of 3 months into the year. The above was my DL planner for last year. Well, one of the four. I used composition books - one per each quarter of the year. By the end of the year I found it frustrating to go back and find things I'd entered in earlier dates that I needed to reference.

What I liked about last year's planner:
The size and basic layout

What I didn't like:
having to break up the year into quarter books.
My small desk area wasn't really equiped for the full dayplanner but a long, narrow notepad I could do.
My challenge was how do I get an entire year into ONE planner when I don't traditionally work 'By the Week'. My Day job has to be done in 'Daily To Do' tasks.
What I wound up doing was using a long, narrow notepad for my Daily To Do. I would put the date at the top, do my daily tasks then at the end of the day use Washi Tape to incorporate it into the journal.

So with a new year of DL approaching I took to YouTube looking up all kinds of things having to do with planners. I figured I could take any planner idea and adapt it to meet my DL planner needs.

I came across THIS video by Danielle Batog about using a deconstructed compostition book. DUH!

So I set about cutting a composition book down the middle. I then decided on my cover for this year. I loved the papers from DCWV Once Upon A Time I used last year. This year I decided to use my favorite slab from Colorbok - Rosewood. I pick up a new slab at Walmart about every other month.
I chose to use some of the swag from the slab this time and picked out Cherish the Moment for the cover accent.


I covered the front and back covers of the comp book. Added border trims from the same slab then covered the entire thing in clear contact. This will help protect the DL planner from anything that might mar the beauty as I cart it from place to place... though I'm not seeing 'carting' being much of an option unless I'm traveling overnight.

Inside, I have a 2-page calendar page:


I had this anchor stamp in one of the sets I purchased from Close To My Heart earlier this year. The anchors note the days my husband is on the boat. This allows me to plan my travel schedule at a glance. 

Aside from the calendar pages, each of the weekly pages are edged on the hole punched side with washi tape then covered in a 1.5" wide strip of clear contact paper. This acts as hole reinforcement. The binder rings are the 2". 

Tomorrow, I'll show you more of the inside 'weekly pages' - which I think I can work with as well as how I'm doing my Daily To Do (DTD).

Then on Wednesday, I'll show you how I'm conquering (at least that's the plan) my absence of actually doing the art challenges last year.

So stay tuned... 2015 is full of Creative Blessings!